6-4
Reading Mode Setting When the Video Interface Option is Installed
This section describes the button specifications and setup details for each of the simplex (front-side),
duplex (front-side) and duplex (back-side) reading modes when the scanner has the video interface option
in the third party slot.
When the reading mode is set by the command from the host computer, the following button operation is
not required.
NOTICE
When the video interface option is installed in the scanner, the scanner automatically recognizes the board
and changes the display.
Whenever you press , the scanner returns to screen M1.
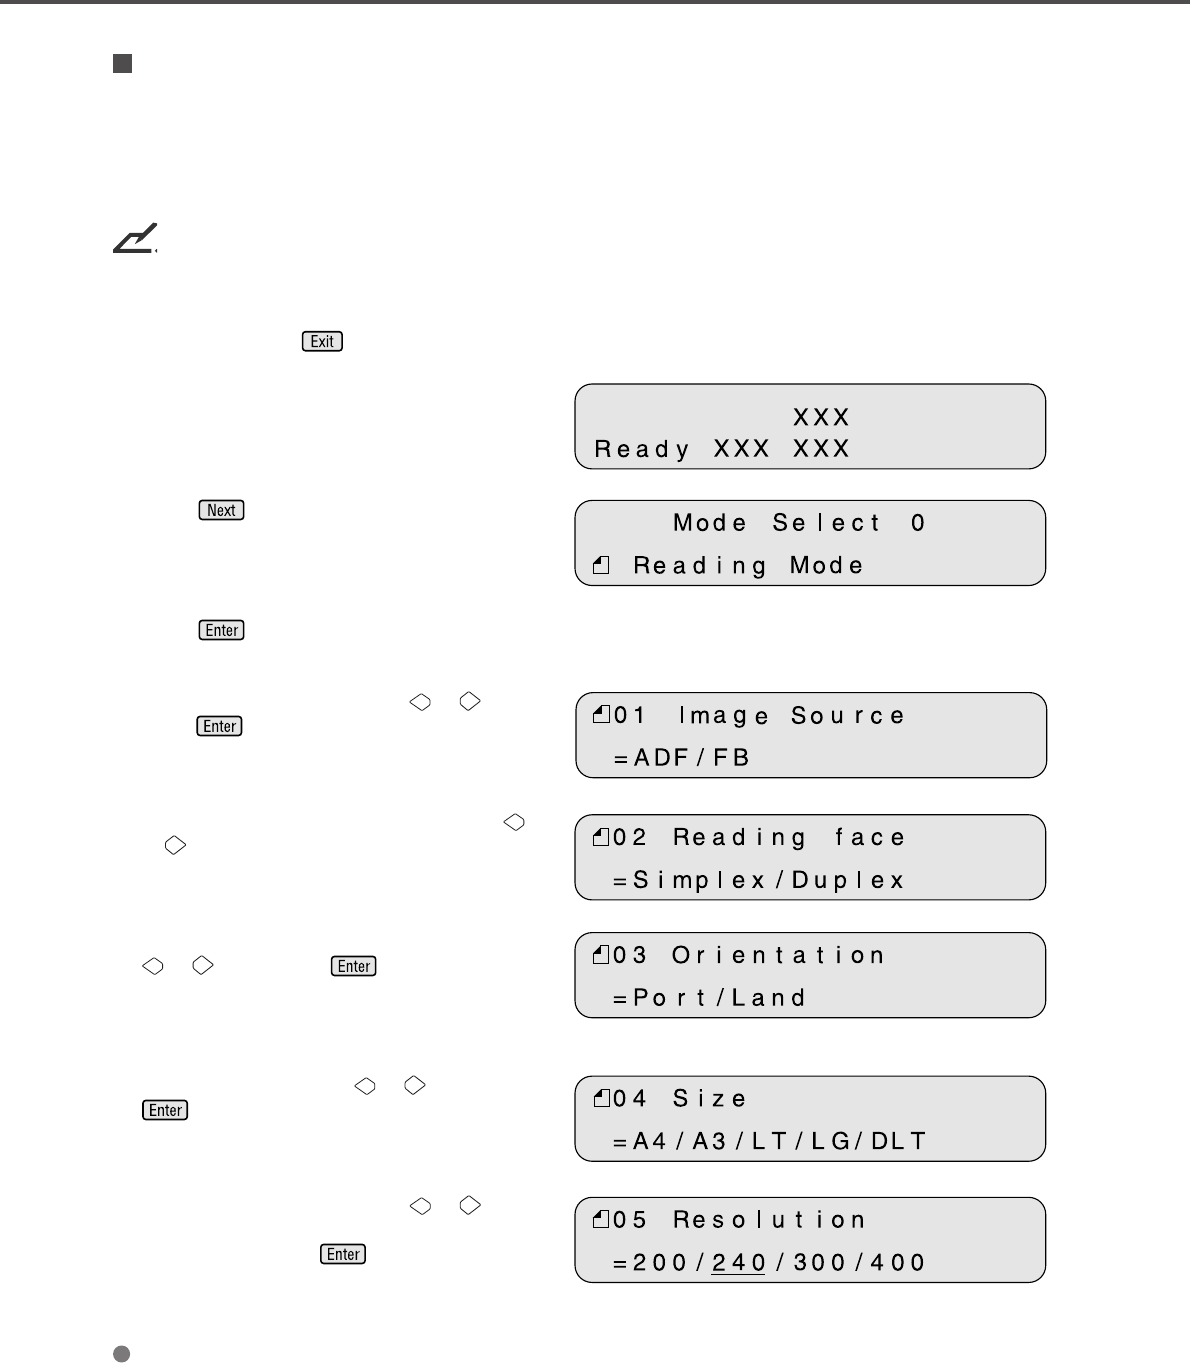
<Screen M1>
1 Turn the power On and verify that “Scanner
Ready” is displayed on the LCD.
<Screen M2>
2 Press then the scanner displays
Screen M2.
3 Press then the scanner displays
Screen 1.
<Screen 1>
4 Select ADF or FB by pressing or then
press . The scanner displays Screen 2.
<Screen 2>
5 Select “Simplex” or “Duplex” by pressing
or . Then press Enter. The scanner
displays Screen 3.
<Screen 2>
6 Select “Portrait” or “Landscape” by pressing
or . Then press . The scanner
displays Screen 4.
<Screen 4>
7 Select Size by pressing or . Then press
. The scanner displays Screen 5.
<Screen 5>
8 Select Resolution by pressing or . As
the cursor moves to the left 100/150 may
appear. Then press . The scanner
displays Screen 6.
