


3. INSTALLATION
6
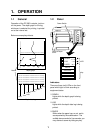
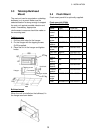
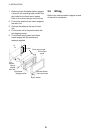
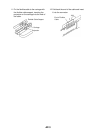
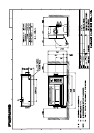
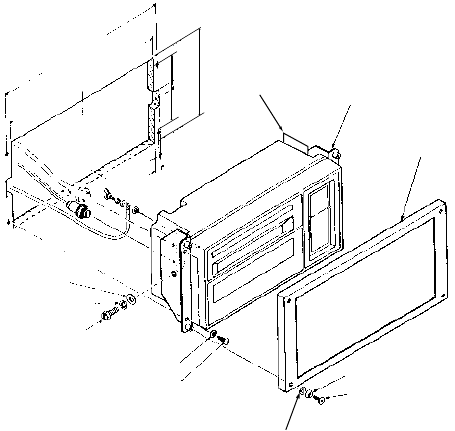
1. Referring to the illustration below, prepare
a cutout in the mounting area and drill four
pilot holes for the flush mount angles.
Refer to the outline drawing at end of manual.
2. Fix the liner and the flush mount angles to
the main unit.
3. Connect the cables at the rear of main
unit.
4. Fix the main unit to the panel cutout with
four tapping screws.
5. Fix the flush mount panel to the flush
mount angles with the screws and
washers supplied.
Tapping screws
Pan head screw
Flat washer
Nylon washer
Rosette washer
Flush mount
panel
Flush mount angle
Flat
washer
Spring
washer
Hex. bolt
295
280
156
7
10
Liner
116
3.5 Wiring
Refer to the interconnection diagram at end
of manual for connection.