A
P-2
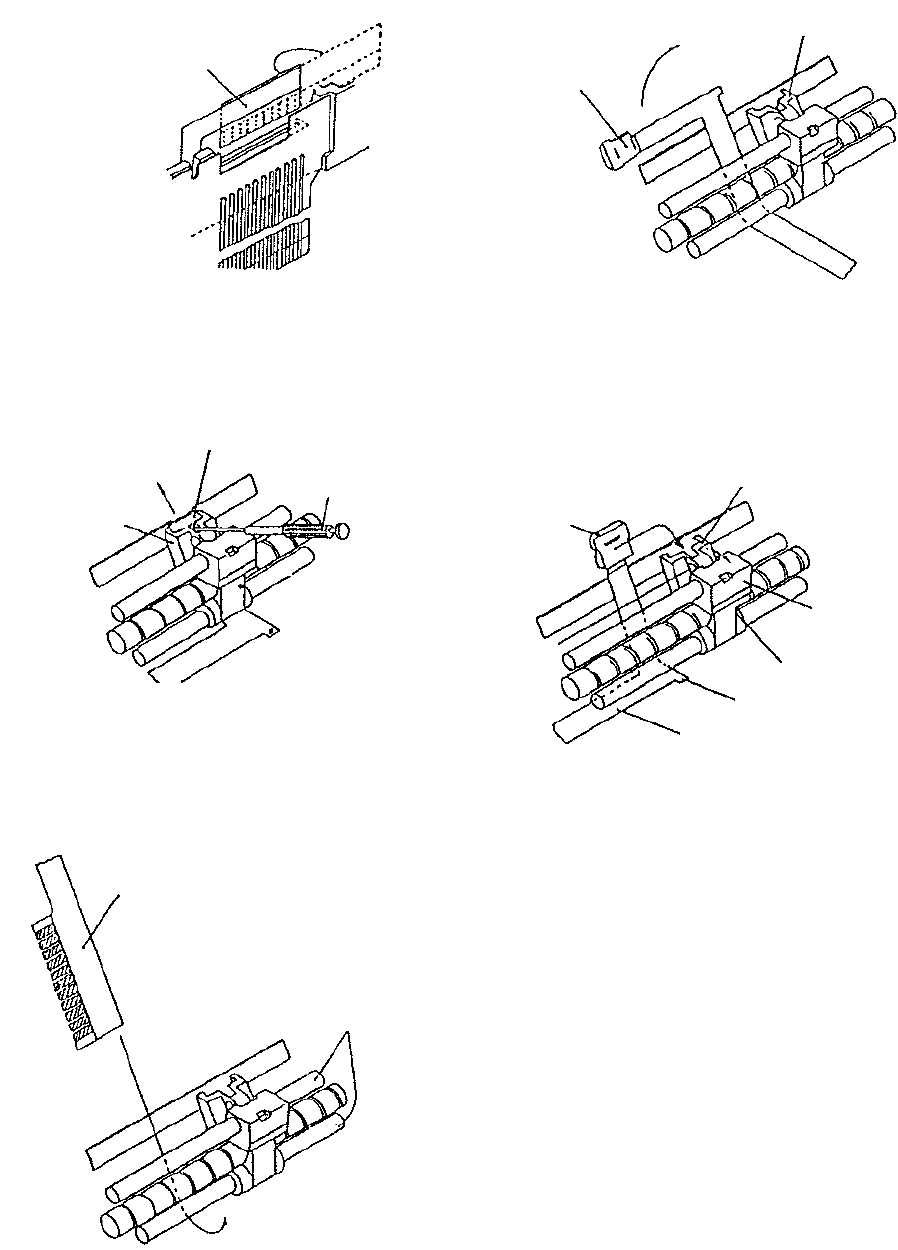
6. Pull out the connector end of the flexible
cable from the connector. Take care not to
damage the flexible cable.
End of Flexible
Cable (Connector)
180°
7. Remove the thermal head from the head
holder with a screwdriver as shown below,
and then take the thermal head assembly
out of the printer assembly.
Thermal Head
Head Holder
Screwdriver
8. As shown below, pass the flexible cable
(connector side) of a new thermal head
assembly beneath the guide pins.
End of Flexible
Cable
Guide Pin
9. Hold the flexible cable end with a
tweezers and pull it out until it is
positioned as shown below.
Thermal
Head
Head Holder
90°
10. Turn the head by 90° so that it is parallel
with the head holder as shown below.
While pulling the head holder toward you,
insert the head into the head holder.
Head Holder
Flexible Cable
Head
Hole
Projection
Carriage


