


20 The Gateway 2000 Solo Multimedia Notebook
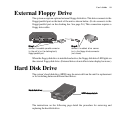
When the hard disk drive is installed and active, the hard disk icon lights in the status
display bar. (See page 8.) The instructions below detail the procedure for installing
or replacing the hard drive:
Step 1:Step 1:
Step 1:Step 1:
Step 1:
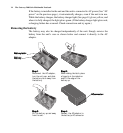
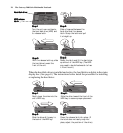
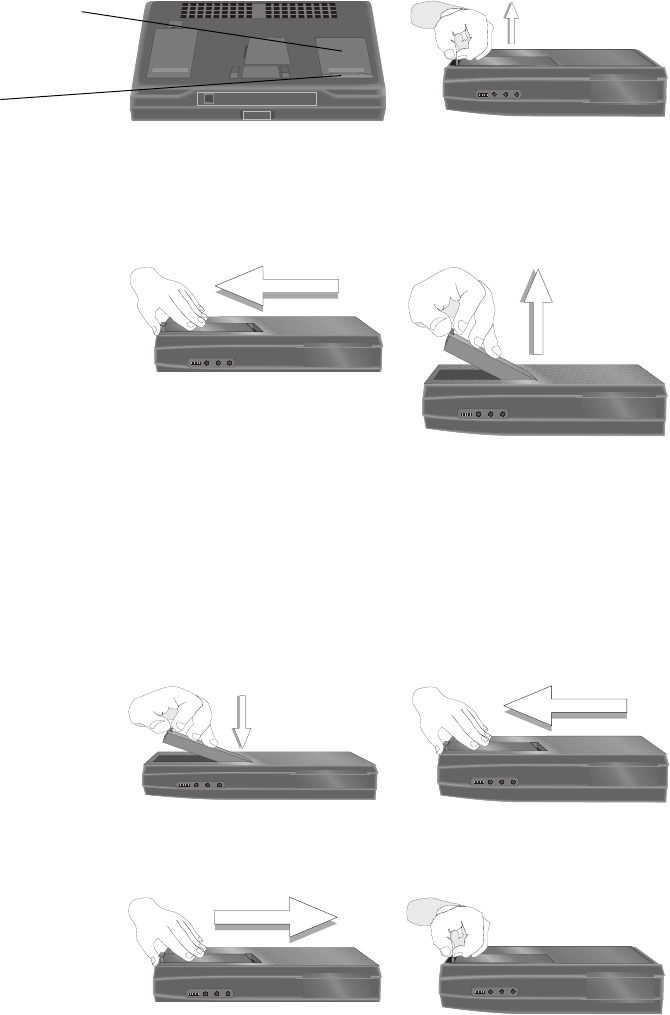
Turn the unit over and locate
the hard disk drive (HDD) and
its release latch.
Step 2:Step 2:
Step 2:Step 2:
Step 2:
Slide a fingernail between the
hard drive and the release
latch. Grasp the latch and pull
it straight up.
Hard disk drive:Hard disk drive:
Hard disk drive:Hard disk drive:
Hard disk drive:
HDD releaseHDD release
HDD releaseHDD release
HDD release
latch:latch:
latch:latch:
latch:
Step 4:Step 4:
Step 4:Step 4:
Step 4:
Grasp the latch and lift the hard drive
up and out of the HDD bay. (The HDD
may need to be slid backwards to free
it from the unit.)
Step 3:Step 3:
Step 3:Step 3:
Step 3:
With the release latch up, slide
the hard drive toward the
front of the unit.
Step 1:Step 1:
Step 1:Step 1:
Step 1:
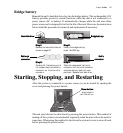
Gently lower the drive into the
unit’s HDD bay.
Step 2:Step 2:
Step 2:Step 2:
Step 2:
Slide the drive toward the front of the
HDD bay to assure proper placement.
Step 3:Step 3:
Step 3:Step 3:
Step 3:
Slide the drive all the way to
the back of the HDD bay.
Step 4:Step 4:
Step 4:Step 4:
Step 4:
Press the release latch into place. (If
the latch does not easily snap into
place, adjust the position of the drive.)