


8
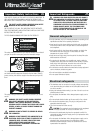
Laminating Tips
• Do not attempt to laminate abrasive or metal items such as staples or
paper clips as they will damage the heat shoes and rollers.
• Do not force items into the nip area of the rollers.An item that is not
easily drawn into the laminator is probably too thick to laminate.
• Wrinkles may result if an attempt is made to reposition an item once the
rollers have grasped it.
• Do not stop the laminator before an item has completely exited the rear
of the laminator. Even a momentary stop will cause a mark (heat line) to
appear on the laminated item.
Adhesive will be deposited on the heat shoes and rollers if:
• Only one roll of film is used.The top and bottom rolls must be used for
problem free lamination.
• One or both rolls of film are allowed to run completely off the core.
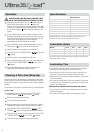
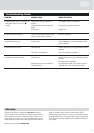
This chart is for reference only.Actual Temperature setting will vary depending on
media thickness and ink coverage.
Material
Copy Paper
Glossy Paper
Photo Paper
1.7mil 3mil 5mil 10mil
5 - 7 5 - 7 5 - 8 5 - 7
6 - 8 6 - 8 6 - 8 5 - 7
6 - 9 7 - 9 7 - 9 5 - 7
Electrical requirements - Refer to the serial plate located on the rear of the
laminator for the specific electrical rating applicable to the unit.
Specifications
Operating Speed
Dimensions (W x L x H)
Weight
Voltage
Current
Power
BTU
Warm-up Time
Ultima35 EZLoad
3 fpm
16.929 x 18.11 x 11.142 inch
35lbs
120V ~ 60Hz / 230 ~ 50Hz
A
W
BTU/hour
1 minute
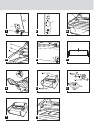
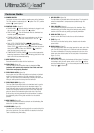
Lamination Guide
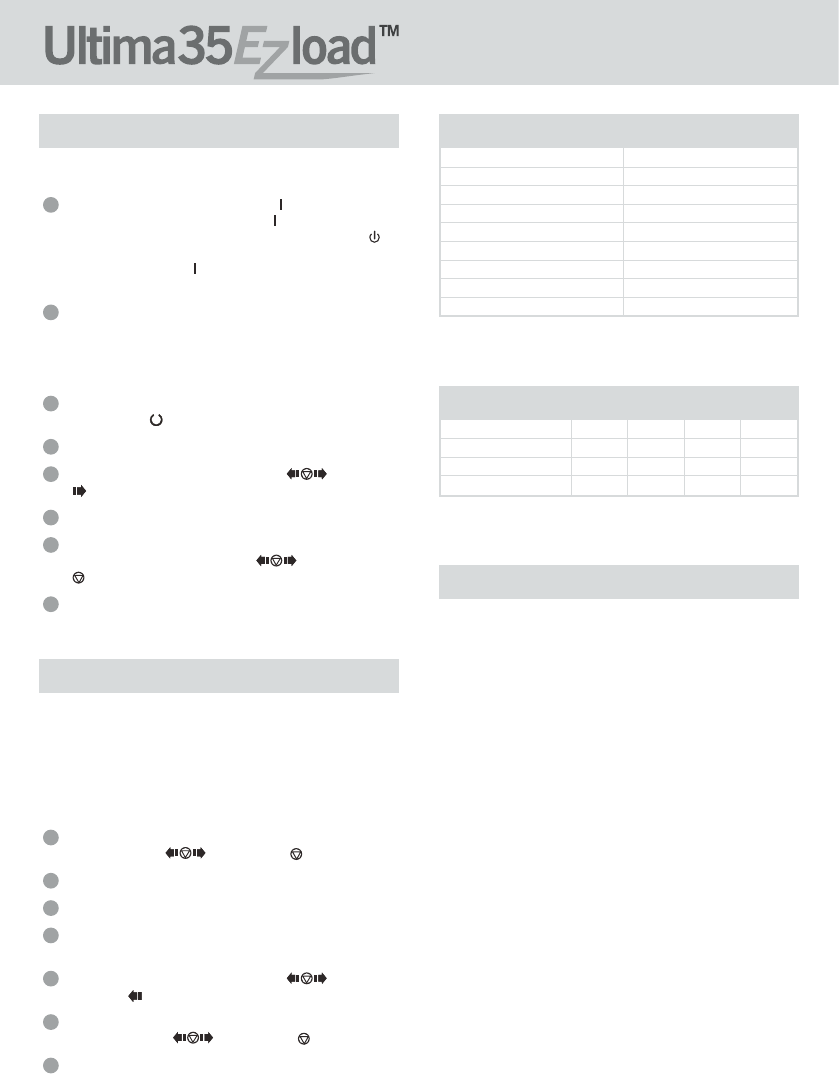
Operation
CAUTION: MAKE SURE HEAT SHIELD AND FEED TABLE
ARE IN THE PROPER POSITION TO OPERATE THE UNIT.
Move the Main Power switch to the ‘ON’ ( ) position (figure 1).
With the main power switch in the ‘ON’ ( ) position,the
laminator can be turned on or off using the standby switch ( )
located on the control panel.When the standby switch is activated
the red power indicator ( ) will illuminate.The laminator is now
heating.
Use the lamination guide on the feed table to select the correct
laminating temperature for the film gauge and media that you are
laminating.The guide will provide a good starting point.You may
need to adjust the temperature up or down slightly to
accommodate the finish or thickness of the media.
When the laminator reaches operating temperature,the green
ready indicator ( ) on the control panel will illuminate.
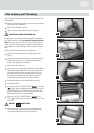
Position the item(s) to be laminated on the feed table.
Move the RUN / STOP / REVERSE SWITCH ( ) to the ‘RUN’
( ) position.
Slide the item(s) to be laminated into the nip rollers.
When the laminated item(s) exit(s the rear of the laminator, move
the RUN / STOP / REVERSE SWITCH ( ) to the ‘STOP’
( ) position.
Use the Rear Slitter located at the back of the laminator to
separate the laminated item(s) from the film web.
8
7
6
5
4
3
2
1
Clearing a Film Jam (Wrap-Up)
Film jams may occur if the laminator is not positioned to allow exiting
film to drop freely to the floor.Accumulation of laminate as it exits the
laminator may cause film to wrap around the roller, causing a jammed
condition.
To clear a jam it is necessary to rotate the rollers in a reverse direction.
To clear a jam:
Immediately stop the laminator by moving the RUN / STOP /
REVERSE SWITCH ( ) to the ‘STOP’ ( ) position.
Remove the feed table and heat shield.
Cut the top and bottom film webs.
Grasp the loose ends of the web and pull straight out.Install the
feed table with the loose ends of the web on top of the table.
Move the RUN / STOP / REVERSE SWITCH ( ) to the
‘REVERSE’ ( ) position and guide the film out of the laminator.
When the film has cleared the heat shoes,move the RUN / STOP
/ REVERSE SWITCH ( ) to the ‘STOP’ ( ) position.
Thread the film per section Film Loading and Threading.
7
6
5
4
3
2
1
ƽ