


GN-B41G Wireless Broadband Router
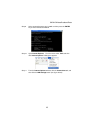
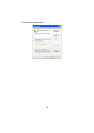
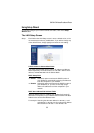
Using Setup Wizard
To manually configure your router’s Internet connection, click on the Setup
Wizard button.
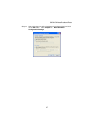
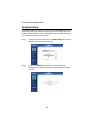
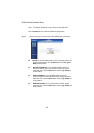
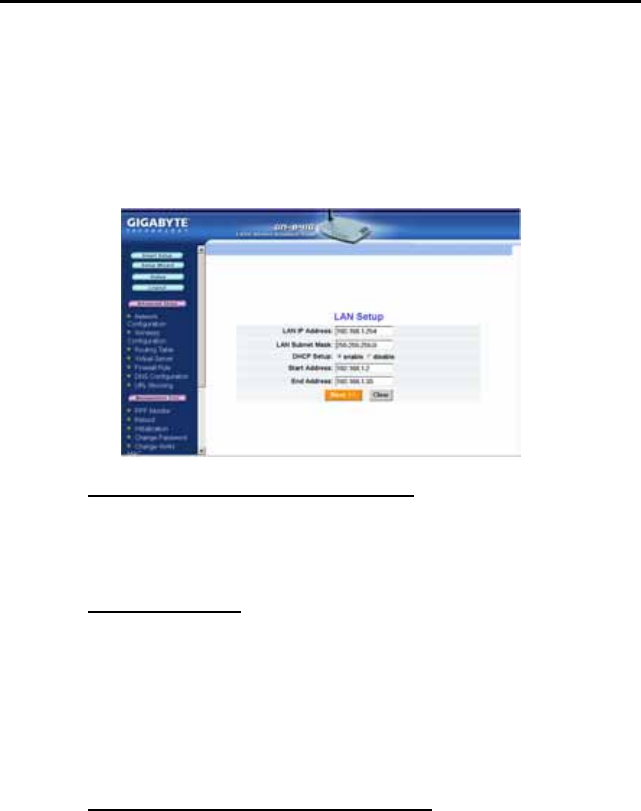
The LAN Setup Screen
Step 1. Each field on the LAN Setup screen is set to a default value, so it is
not necessary to make any modifications. If you wish to change any
of the default values, simply highlight and enter the new setting.
LAN IP Address & Subnet Mask Fields
The values in these fields are the router’s IP address and Subnet
Mask respectively. The default values are 192.168.1.254 for the IP
address, and 255.255.255.0 for the Subnet Mask.
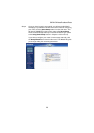
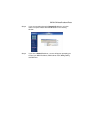
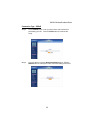
DHCP Setup Field
Enable Select this option to activate the DHCP function of
your GN-B41G, automatically assigning IP addresses
to all the computers in your network.
Disable Select this option to de-activate the DHCP function of
your GN-B41G. (ie. you have to manually assign
different IP addresses to all the computers in your
network.
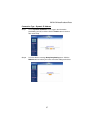
DHCP Start Address/End Address Fields
When the DHCP feature is enabled, your GN-B41G will assign IP
addresses to computers on your network that are between the Start
Address value and the End Address value.
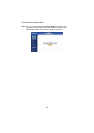
For example: Assuming that the start address is 192.168.1.1 and
end address is 192.168.1.50, the assigned IP address
will be between 192.168.1.1 and 192.168.1.50.
33