Connect the printer to a wired network
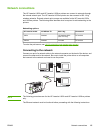
To connect the HP LaserJet 1022n or HP LaserJet 1022nw printer to a wired network, you
need the following:
● Functional wired network
● CAT-5 Ethernet cable
To connect the printer to the network, perform the following steps:
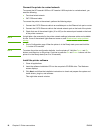
1. Connect the CAT-5 Ethernet cable to an available port on the Ethernet hub port or router.
2. Connect the CAT-5 Ethernet cable to the internal network port on the back of the printer.
3. Check that one of the network lights (10 or 100) on the network port located on the back
of the printer comes on.
NOTE
It might take a few moments for the printer network settings to become active and available
for use. If one of the network lights does not come on, see
Wired network setup problem
solving.
4. Print a Configuration page. When the printer is in the Ready state, press and hold the
G
O
button for 5 seconds.
NOTE
To restore the printer configuration defaults, turn the printer off. Hold the C
ANCEL
and G
O
buttons, and then turn on the printer. Continue to press the G
O
and C
ANCEL
buttons until the
printer is in the Ready state (from 5 to 30 seconds).
Install the printer software
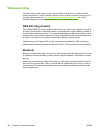
1. Close all applications.
2. Insert the software installation CD into the computer's CD-ROM drive. The Welcome
screen displays.
3. Click Next, and follow the installation instructions to check and prepare the system and
install drivers, plug-ins, and software.
This might take several minutes.
16 Chapter 2 Printer connections ENWW


