


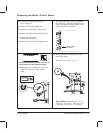
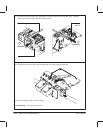
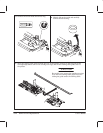
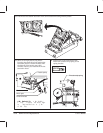

9 Remove the screw inside the ferrite ring.
Torx-15
10 Slightly lift up the guide and carefully
remove the ferrite ring.
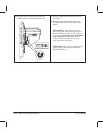
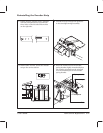
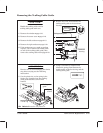
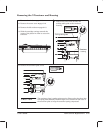
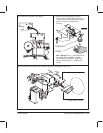
11 Move the trailingĆcable guide towards the rear of the plotter, rotate it to clear the arm of the
cartridgeĆadjustment cam on the cartridge carriage, and lift the trailingĆcable guide clear of
the plotter.
CAUTION
Be careful not to scrape the cartridgeĆcarriage
PCA with the trailingĆcable guide if you are
sliding the guide under the trailing cable.
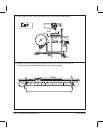
6Ć44 Removal and Replacement
C3187Ć90000