


IE: Unknown: 32041224606C
IE: WPA Version 1
Group Cipher : CCMP
Pairwise Ciphers (1) : CCMP
Authentication Suites (1) : PSK
IE: Unknown: DD07000A5E01010006
Bit Rates:1 Mb/s; 2 Mb/s; 5.5 Mb/s; 11 Mb/s; 6 Mb/s
12 Mb/s; 24 Mb/s; 36 Mb/s; 9 Mb/s; 18 Mb/s
48 Mb/s; 54 Mb/s
Extra:tsf=00000a61dbf1d037
Extra: Last beacon: 2432ms ago
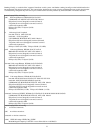
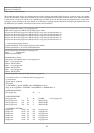
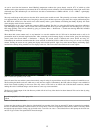
Table-3. Iwlist scan output.
As can be seen from the above output that various WAP's have been detected meaning that the 802.11 controller is functioning
properly. As can be noticed there are a few hidden SSID's within that list which are all part of my home networks configuration.
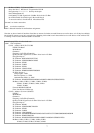
In order to connect to any wired or wireless networks without the use of GUI tools we need to have a look at the configuration files for
the interfaces. This can be found in /etc/network/ directory in a file called interfaces. Issuing the command: nano
/etc/network/interfaces after su'ing to root we can start building the file up with our configuration:
auto lo
iface lo inet loopback
auto eth0
iface eth0 inet dhcp
auto wlan0
iface wlan0 inet dhcp
wireless_essid [Wireless LAN ESSID]
wireless_enc [40-bit or 128-bit WEP key in HEX]
Table-4. Network interface file configuration.
By default, the loopback interface is always listed in this file however the other physical interfaces may not be, for this reason we can
add them in like so. Obviously depending on whether the needs of the end user are static or dynamic in terms of the layer 3 addressing
means, one can put in inet dhcp or static followed by the IP address, subnet mask, and default gateway.
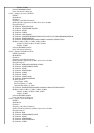
To test if our system has been associated with the WAP or not, we can perform a ping test to verify, as any user from the terminal
typing in: ping -c 5 followed by the IP address of the gateway the notebook is connected to. A sample output is shown below:
root@Compaq2230s:~# ping -c 5 192.168.0.1
PING 192.168.0.1 (192.168.0.1) 56(84) bytes of data.
64 bytes from 192.168.0.1: icmp_seq=1 ttl=255 time=1.73 ms
64 bytes from 192.168.0.1: icmp_seq=2 ttl=255 time=1.54 ms
64 bytes from 192.168.0.1: icmp_seq=3 ttl=255 time=1.33 ms
64 bytes from 192.168.0.1: icmp_seq=4 ttl=255 time=1.55 ms
64 bytes from 192.168.0.1: icmp_seq=5 ttl=255 time=1.53 ms
--- 192.168.0.1 ping statistics ---
5 packets transmitted, 5 received, 0% packet loss, time 4007ms
rtt min/avg/max/mdev = 1.334/1.539/1.732/0.126 ms
Table-5. Gateway connectivity ping test.
The test reveals that connection was successful as 5 replies were sent and received from the gateway. Now that we have network
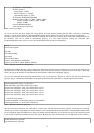
connectivity we need to setup DNS if we wish to connect at all to the internet and resolve hostnames. If running DHCP without DNS
servers configured within the DHCP server setup or if running static IP addressing, we can look in our resolv.conf config file located
in /etc in order to add name resolution servers to our system. By using our trusty text editor nano, we can add name servers as follows:
domain domain.com {optional}
search domain.com {optional}
9