


Separating Topcase and Bottom Case, Removing Display Assy and Service Keyboard Topcase
(Hewlett-Packard Authorized Service Providers Only)
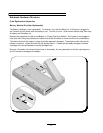
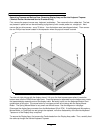
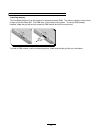
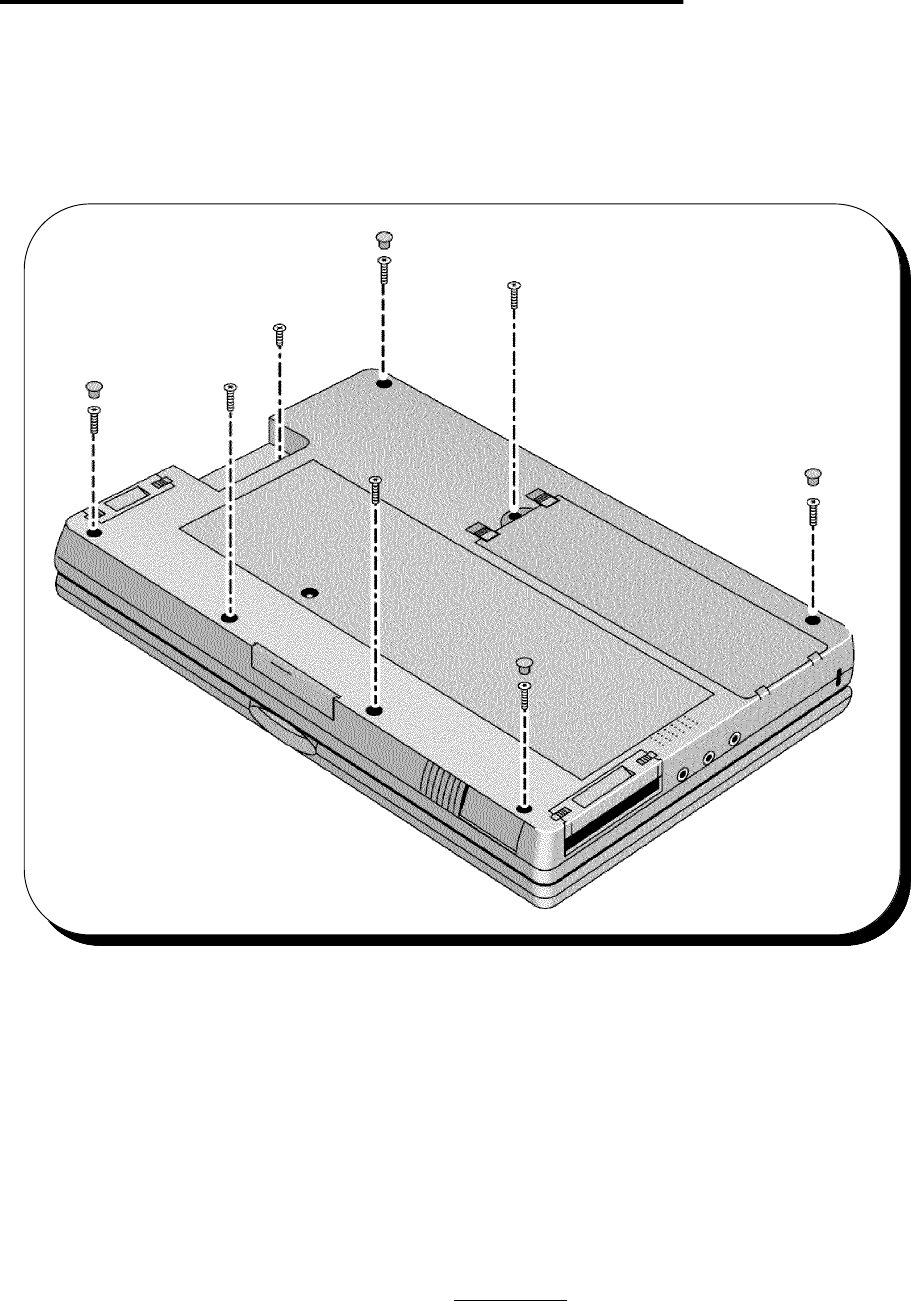
First, remove the pop-out mouse assy, keyboard, and battery. Then remove the four rubber feet. The feet
are pressed in place and can be removed by prying them up with a metal probe or a straight pin. Next
remove the torx drive screws - use a T6 driver - from the bottom case (see diagram below). Then remove
the one Phillips head screw located in the depression where the pop-out mouse is stored.
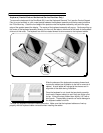
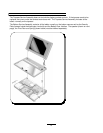
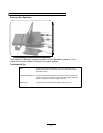
Turn the unit right side up with the display closed. Lift up on the front topcase seam where it meets the
bottom case near the PCMCIA card eject lever. Once the topcase is separated from the bottom case, rotate
the topcase/display assembly around the display cable. Be careful not to turn the Keyboard Bottom Case
upside down at this point. The mouse button is now loose and will fall out along with the Spring Mouse
Button. The Spring Mouse Button is very small and difficult to see. See the diagram on next page.
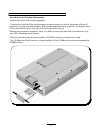
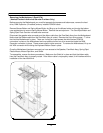
Disconnect the display Assy connector from the Motherboard (Exch PCA). If the Motherboard, Microphone,
Mouse Button, or Card Eject arm are going to be replaced, no further disassembly of the Service Keyboard
Topcase or of the Display Assy is required.
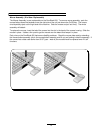
To remove the Display Assy, first remove the Ferrite beads from the Display Assy cable. Then, carefully feed
the cable up through the Service Keyboard Topcase.
24