


4
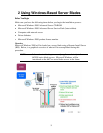
1 Using Linux-Based Server Blades
Overview
The information in this chapter was previously contained in the HP Blade Server bh7800
Installation Guide and comes from chapter two of the guide. Please see the HP Blade
Server bh7800 Installation Guide for detailed information as to what has happened prior
to this point.
The quick overview up to this point is that server power source has been determined to be
within specifications as determined in chapter one of the HP Blade Server bh7800 Site
Preparation Guide. The power source has been plugged into both the power supplies for
the blade server as outlined in the HP Blade Server bh7800 Installation Guide and the
system has been powered up to a state that requires OS intervention. This OS
intervention is described below for blades running the Linux OS.
NOTE: Information in this chapter applies exclusively to the bh7800 series
blade servers. Linux will be introduced on the bh37xx series blade
server in the future.
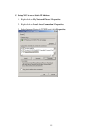
Procedure
1. The server blades power on and begin their initialization process. Let the
initialization proceed, without responding to any prompts until the Linux “login:”
prompt appears on your display. During initialization, you see the following:
a. The amber and red LEDs on the server blades go ON. These LEDs are visible
through the two USB ports. They indicate that power to the server blade is ON.
b. After a few seconds, the amber LED on your monitor power switch should turn
green.
c. Soon, your monitor should display BIOS messages. Power-on selftests are
performed. When the blade successfully completes selfest, the monitor displays the
BIOS version number and a prompt such as “Press F2 for SETUP…”. Do not respond to
the prompt for now.
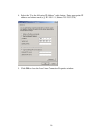
d. After the BIOS boot-up screen, you see messages about PXE if PXE boot is
turned on in BIOS. If both PXE boots are turned on (on Ethernet 0 and 1), you see two
sets of these messages.
e. Under the PXE messages, the screen displays messages about the Remote
Management Card (RMC), including a prompt to enter RMC setup. Do not respond to