


Installing the Emulex CNA
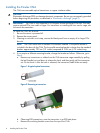
The CNA uses removable optical transceivers or copper interface cables.
CAUTION:
Electrostatic discharge (ESD) can damage electronic components. Be sure you are properly grounded
before beginning this procedure, as described in “Electrostatic discharge” (page 9).
IMPORTANT: The CNA is only supported in PCI Express 8 lane and larger PCIe slots. This may
require optional PCIe riser cards or cages. For instructions on installing the riser card or cage, see
the server documentation.
To install the CNA into a server:
1. Be sure the server is powered off.
2. Remove the access panel.
3. Wearing an anti-static wrist strap, remove the blank panel from an empty x8 or larger PCIe
bus slot.
NOTE: The CNA comes with a standard PCIe bracket installed. A low-profile bracket is
included in the box with the CNA. The low-profile mounting bracket is shorter than the standard
bracket: approximately 7.90 cm (3.11 inches) compared to 12.06 cm (4.75 inches) long.
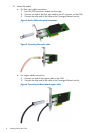
4. If you require a different mounting bracket, change the bracket as follows. Otherwise, go to
Step 5.
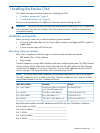
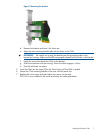
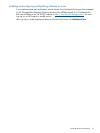
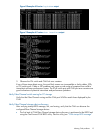
a. Remove any transceivers or cables from the CNA transceiver cage assembly by pulling
the bail (handle) out and down to release the latch, and then gently pull the transceiver
out. Do not force it. After the latch is released, the transceiver/cable slides out easily.
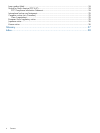
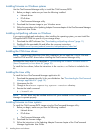
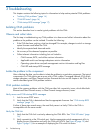
Figure 1 A typical optical transceiver
Figure 2 Removing a transceiver
b. Observing ESD precautions, store the transceiver in an ESD-safe place.
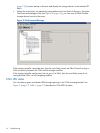
c. Remove the mounting bracket screws from the top of the CNA.
6 Installing the Emulex CNA