


3. Click Document Options, and then click Printer Features.
4. Click Dry Time, then select Change in the drop-down list, and then click the
Change button. A Dry Time slider appears.
5. Move the Dry Time slider toward Less or More.
6. Click OK.
7. Click Ink Volume, then select Change in the drop-down list, and then click the
Change button. An Ink Volume slider appears.
8. Move the Ink Volume slider toward Light or Heavy.
Note If you increase the ink volume, move the Dry time slider toward
More to avoid smearing the ink.
9. Click OK, and then click OK again.
Select a specific paper type
1. Open the Printer Properties dialog box.
2. Click the Paper/Quality tab.
3. In the Type is drop-down list, click an appropriate paper type.
Do not select Automatic.
4. Click OK, and then click OK again.
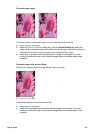
Document is misprinted
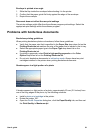
Text and images are misaligned
If the text and images on your printouts are misaligned, then align the print cartridges.
Document is printed off-center or at an angle
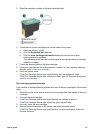
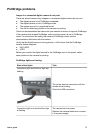
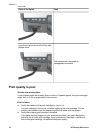
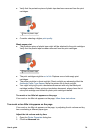
1. Verify that the paper is correctly placed in the In tray.
2. Verify that the paper guide fits firmly against the edge of the paper.
3. Reprint the document.
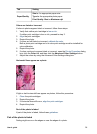
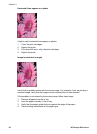
Parts of the document are missing or printed in the wrong place
Open the Printer Properties and confirm the following options:
Tab
Setting
Finishing Orientation: Verify the appropriate orientation.
Paper/Quality Size is: Verify the appropriate paper size.
Effects
Scale to fit: Select this option to scale text and
graphics to the paper.
If parts of the document are still missing, the printer settings might be overridden by
the software program print settings. Select the appropriate print settings from within
the software program.
Chapter 11
80 HP Deskjet 5900 series