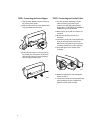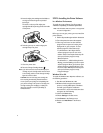
STEP 1: Connecting the Power Adapter
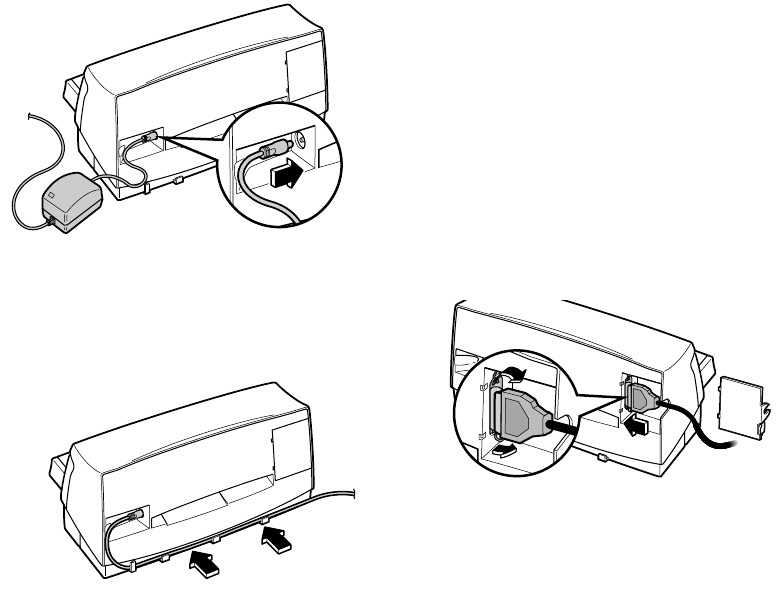
1. Plug the power adapter connector firmly into
the printer’s power socket.
2. Plug the other end of the power adapter cable
into a grounded electrical outlet.
3. If the electrical outlet is on the same side as
the parallel port on the printer, fit the power
cable into the cable track so that the power
cable is neatly housed in place.
STEP 2: Connecting the Parallel Cable
1. You must purchase separately a parallel
cable to connect your printer to your
computer. Use any high-quality parallel
printer cable, or order HP part no. C2950A or
C2951A from your local HP dealer.
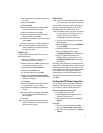
2. Make sure the printer and the computer are
turned off.
3. Remove the parallel port cover from
the printer.
4. Connect the printer end of the parallel cable
firmly to the parallel port on the printer.
(Refer to the user’s guide for your computer
to find the parallel port on your computer.)
5. Snap both clips into the notches on the
connector.
6. Replace the parallel port cover and align the
cable in the notch.
7. Connect the computer end of the parallel cable
to the parallel port on your computer and
tighten the screws on the connector.
2642008
2642007
2642006
2


