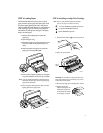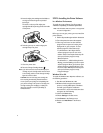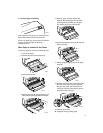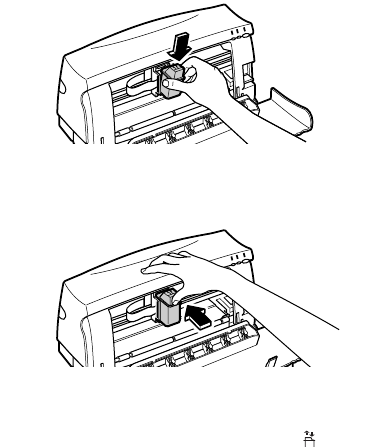
5. Insert the inkjet print cartridge into the holder at
an angle such that the green top is tilted
toward you.
The arrow on the top of the inkjet print
cartridge should be pointing toward the inside
of the printer.
6. Push the green top in until the inkjet print
cartridge snaps into place.
7. Close the printer door.
8. Press the Change Cartridge button ( ).
Note: If you did not install a recommended inkjet print
cartridge, the print cartridge holder will move back
to the loading position, and the Change Cartridge
light will continue to blink.
CAUTION: The ink in the inkjet print cartridge has
been carefully formulated by Hewlett-Packard to
ensure superior print quality and compatibility with
your printer. Damage to the printer or the inkjet print
cartridge resulting from modifying or refilling the
inkjet print cartridge is not the responsibility of
Hewlett-Packard.
STEP 5: Installing the Printer Software
In a Windows Environment
To install the printer software, first refer to page 17,
“Hardware Compatibility” for hardware requirements.
Note: The HP DeskJet 420 series printer is not supported
in network configuration.
Before you can use your printer, you must install the
printer software.
1. Perform all procedures given earlier in this section.
2. Turn on the printer, then turn on the computer.
3. Close any screen saver or other software
programs that are open and running in the
background on your computer. To close
software programs, follow these steps:
• For Windows 95 or 98 – Right-click the
software program’s name or icon on the
taskbar. Select Close. Repeat these steps for
each open software program, except
Windows Explorer.
• For Windows 3.1x – While holding down the
Alt key, press the Tab key to locate an open
software program. When you locate an open
software program, release both keys. In the
File menu, select Exit. Repeat these steps for
each open software program, except
Program Manager.
Windows 95 or 98:
To install the Windows 95 or 98 printer software, use
the following procedure:
1. Start Microsoft Windows 95 or 98.
2. Windows should recognize the attached
printer as a newly added piece of hardware
and walk you through the installation
instructions. If a screen with instructions does
not appear, do the following:
3. Click on the Start button.
4. Choose Settings in the Start menu.
5. Click Printers in the Settings menu.
6. Double-click Add Printer in the Printers
window.
2642015
2642014
4


