


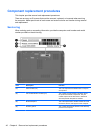
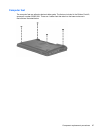

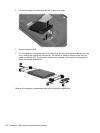


4. Remove the Phillips PM2.5×6.0 screw that secures the optical drive to the computer.
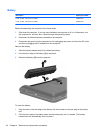
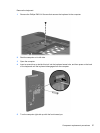
5. Insert a thin tool, such as an unbent paper clip (1), into the optical drive release hole. (The
optical drive tray releases.)
6. Use the optical drive tray to remove the optical drive (2) from the computer.
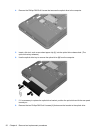
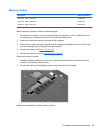
7. If it is necessary to replace the optical drive bracket, position the optical drive with the rear panel
toward you.
8. Remove the two Phillips PM2.0×4.0 screws (1) that secure the bracket to the optical drive.
50 Chapter 4 Removal and replacement procedures