


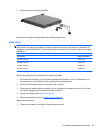
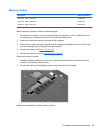


Keyboard
NOTE: The keyboard spare part kit includes a keyboard cable.
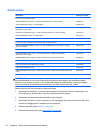
Description Spare part number
Keyboard with black finish for use in Brazil 636376-201
Keyboard with black finish for use in Canada 636376-121
Keyboard with black finish for use in India (for use only with computer models equipped with an
Intel processor)
636376-D61
Keyboard with black finish for use in Japan 636376-291
Keyboard with black finish for use in Latin America 636376-161
Keyboard with black finish for use in Saudi Arabia (for use only with computer models equipped
with an Intel processor)
636376-171
Keyboard with black finish for use in South Korea 636376-AD1
Keyboard with black finish for use in Taiwan 636376-AB1
Keyboard with black finish for use in Thailand 636376-281
Keyboard with black finish for use in the United States 636376-001
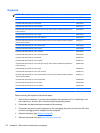
Keyboard with silver finish for use in Brazil 645893-201
Keyboard with silver finish for use in Canada 645893-121
Keyboard with silver finish for use in India (for use only with computer models equipped with an
Intel processor)
645893-D61
Keyboard with silver finish for use in Japan 645893-291
Keyboard with silver finish for use in Latin America 645893-161
Keyboard with silver finish for use in Saudi Arabia (for use only with computer models equipped
with an Intel processor)
645893-171
Keyboard with silver finish for use in South Korea 645893-AD1
Keyboard with silver finish for use in Taiwan 645893-AB1
Keyboard with silver finish for use in Thailand 645893-281
Keyboard with silver finish for use in the United States 645893-001
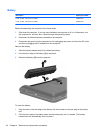
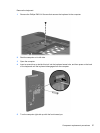
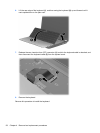
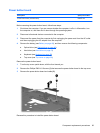
Before removing the keyboard, follow these steps:
1. Shut down the computer. If you are unsure whether the computer is off or in Hibernation, turn
the computer on, and then shut it down through the operating system.
2. Disconnect all external devices connected to the computer.
3. Disconnect the power from the computer by first unplugging the power cord from the AC outlet
and then unplugging the AC adapter from the computer.
4. Remove the battery (see
Battery on page 48).
5. Remove the optical drive (see
Optical drive on page 49).
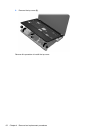
56 Chapter 4 Removal and replacement procedures