


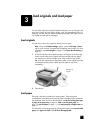

hp psc 2170 series
chapter 2
6
If you do not do anything else with your HP PSC, the settings that you
adjusted will return to their default settings within two minutes. The number
of copies returns to one and the copy percentage returns to 100%.
8 If you do not want to wait for two minutes, press Cancel.
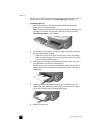
Next you will use the Fit to Page option to enlarge your photograph.
9 Press Options until Reduce/Enlarge appears.
10 Press until Fit to Page appears.
11 Press Start Black or Start Color.
A copy of your picture is printed, which fills the whole page.
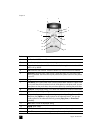
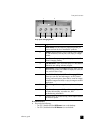
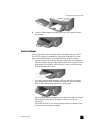
setup button
The Setup button lets you enter the menu system that you use to change scan
setup, as well as perform maintenance and print reports.
1 Press Setup.
The first submenu appears.
2 Press Setup repeatedly to view all the submenus.
The submenus are as follows:
– 1:Print Report
– 2:Maintenance
3 Press Setup until Print Report appears, then press Enter.
4 Press until Self-Test Report appears, then press Enter.
A self-test report is printed.
This concludes the brief tutorial.
Review the rest of this HP PSC 2170 Series help to find out how to make
other changes and use other features.
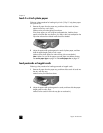
use your hp psc with a computer
If you installed the HP PSC software on your computer according to the Setup
Poster, you can access all the features of the HP PSC using the HP Director.
review the hp photo & imaging director
The HP Director is available through the desktop shortcut.
for windows users
1 Do one of the following:
–Double-click the hp director icon on the desktop.
– In the Windows taskbar, click Start, point to Programs or All Programs
(XP), point to Hewlett-Packard, point to hp psc 2170, then choose
hp photo & imaging director.
2 In the Select Device box, click to see a list of installed HP devices.
3 Select hp psc 2170.
The Director displays only the buttons that are appropriate for the selected
device.