Pub. 42004-693L2C
Model 69320-101 Voice Network Adapter Page: 10 of 15
\\s_eng\gtcproddocs\standard ioms - current release\42004 instr. manuals\42004-693l2c.doc
04/06
Changing to a 69320-101 VNA from a 69266-001 T1 Interface
NOTES:
1. The 69320-101 VNA is not electrically compatible with its predecessors. If further information on the
differences is needed, please contact the GAI-Tronics Field Service Department at 800-492-1212.
2. When upgrading to a 69320-101 VNA, the following four upgrades are required:
• Any 69266-001 or 69320-001 VNAs must be upgraded to the 69320-101 VNA.
• Any 69257-003, 69257-002, or 69257-001 APIs must be upgraded to the 69257-101 API.
• Any 69510-001, 69215-003, 69215-002, or 69215-001 backplane termination boards must be
upgraded to the 69510-101 Termination board. Two of these boards are required per card rack.
• The upgraded cards must be installed in the proper backplane slot. This task involves moving the
card and the associated ribbon cable at the rear of the card rack assembly.
The 69266-001 T1 Interface uses a different switch and jumper collection than the VNA. The following
text states how to convert the T1 Interface switch and jumper setting to the VNA switch and jumper
settings.
The 2xx/3xx Address (P2) shorting clip should be set to the 2xx position if the shorting clip on J1 of the T1
Interface is closer to the back of the T1 Interface. Otherwise, set to the 3xx position when the shorting clip
on J1 of the T1 Interface is closer to the front of the T1 Interface.
N
OTE: The silkscreen for J1 on the T1 interface should be blacked out; if not blacked out, then that
silkscreen shows the 2xx / 3xx position reversed from the actual meaning of J1.
The Board Address (SW3) rotary switch on the VNA should match the Board Address rotary switch on the
T1 Interface.
The Board Identification (SW2) rotary switch on the VNA should match the Board Identification rotary
switch on the T1 Interface.
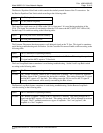
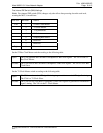
First internal DIP switch #1 (SW4) (ST-Bus Clock Master) should be set to CLOSED if J3 of the T1
Interface is set to ING (ignore – shorting clip towards front). Otherwise, set to OPEN when J3 of the T1
Interface is set to GEN (generate – shorting clip towards back).
First internal DIP switch #2 (SW4) (T1 Clock Master) should be set to CLOSED if J4 of the T1 Interface is
set to GEN (generate – shorting clip towards front). Otherwise, set to OPEN when J4 of the T1 Interface is
set to REC (receive – shorting clip towards back).
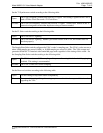
First internal DIP switch #3 (SW4) (T1 Synchronous) should be set to OPEN.
First internal DIP switch #4 (SW4) (E1 Select) should be set to OPEN.
First internal DIP switch #5 (SW4) (Sampling Rate Select) should be set to OPEN.
First internal DIP switch #6 (SW4) through #8 (Reserved) should be set to OPEN.


