


ETX-DB-ATX
7
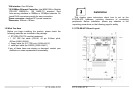
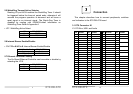
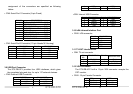
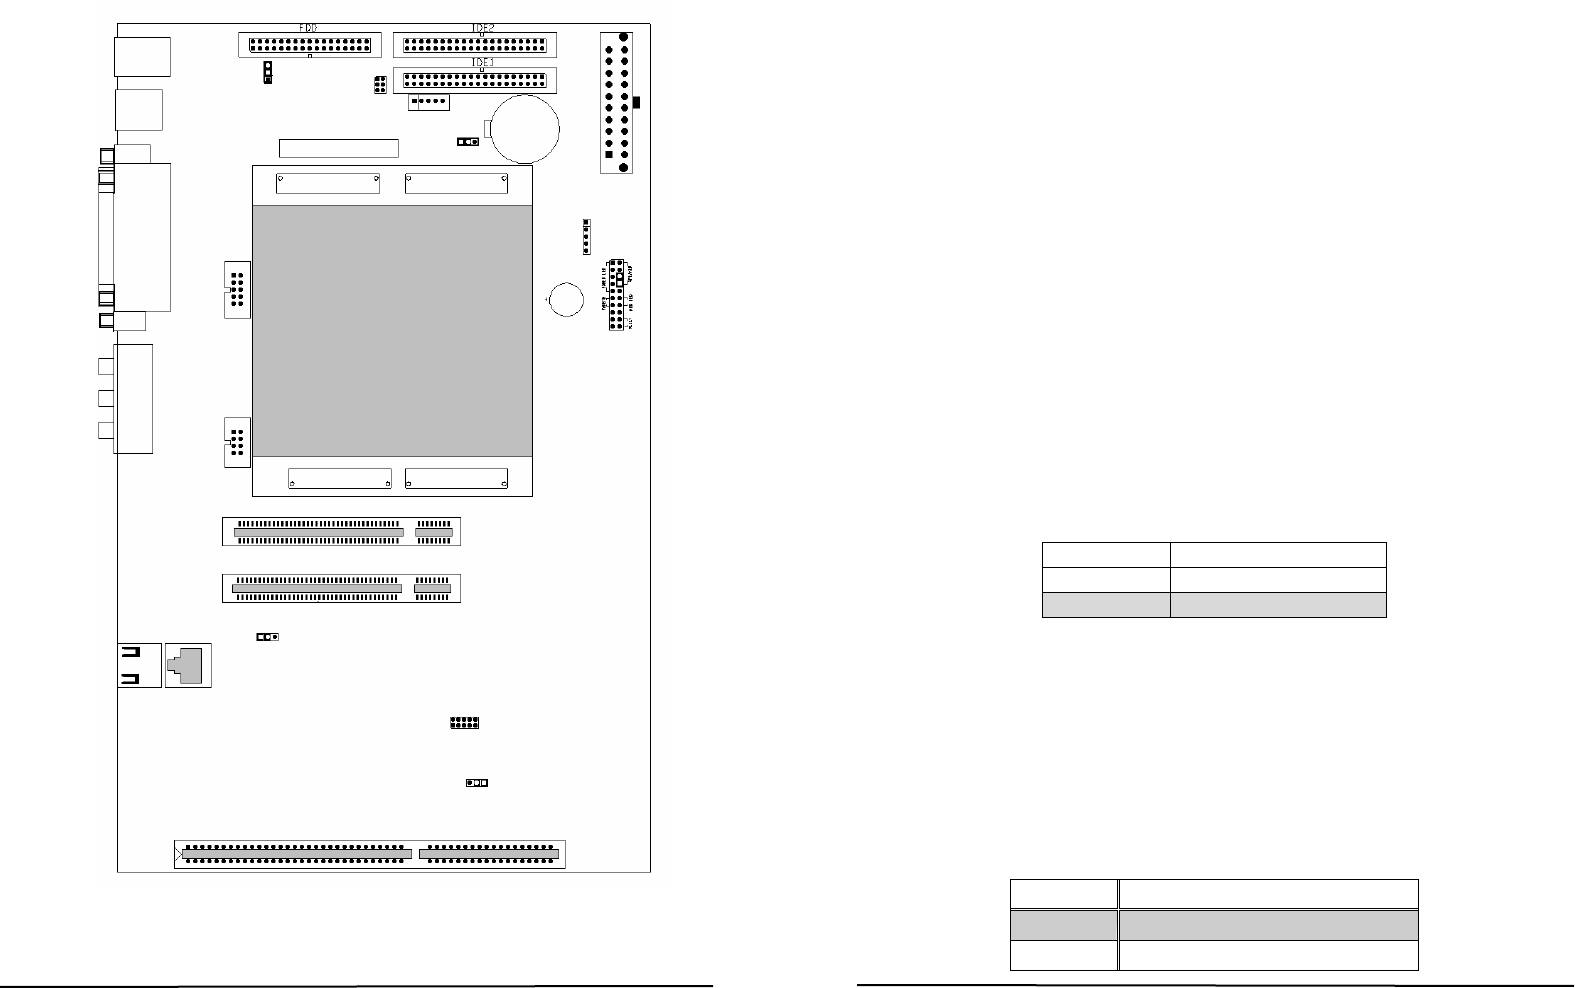
ETX-DB-ATX Layout
CN16
ATX PWER
JP7
Battery
ISA1
CN9
JP6
Digital IO
P
S
L
O
T2
P
S
L
O
T1
X1 X2
CN1
CN10
CN20
CN13
CN14
CN3
USB3
ETX-DB-ATX V1.2
COM2
CN11
X3 X4
CN2
CN8
CN5 CN6
CN12
JP4
CN15
IR
CN4
CN7
CN21
USB2
KB/MS
USB
COM1
LPT1
VGA
AUDIO
48 BIT LVDS
CN17
JP10
ETX-DB-ATX
8
2.2 Unpacking Precautions
Some components of ETX-DB-ATX are very sensitive to static
electric charges and can be damaged by a sudden rush of
power. To protect it from unintended damage, be sure to note
these precautions:
Ground yourself to remove any static charge before touching
the ETX-DB-ATX. You can do it by using a grounded wrist
strap at all times or by frequently touching any conducting
materials that is connected to the ground.
Handle your ETX-DB-ATX by its edges. Don’t touch IC chips,
leads or circuitry if not necessary.
Do not plug any connector or jumper while the power is on.
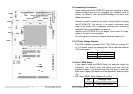
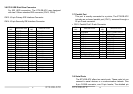
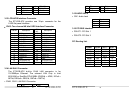
2.3 LCD Vcc Voltage Selector
The LCD interface connector CN1, CN2, CN6 can provide 5V
or 3.3V power supply by selecting the JP4 to meet the different
LCD requirement.
JP4 DESCRIPTION
1-2 5V
2-3 3.3V
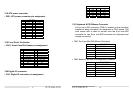
2.4 Clear CMOS Setup
If you need to clear the CMOS Setup (for example, forgot the
password, you should clear the setup and then set the
password again.), you should close the JP6 about 3 seconds,
then open it again. Set back to normal operation mode by open
JP6.
•
JP6: Clear CMOS Setup (Reserve Function)
JP6 DESCRIPTION
1-2 Normal Operation
2-3 Clear CMOS Setup