


6
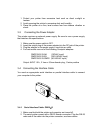
3. Use a screw driver to fasten the cable screws to the t wo nut screws
installed on the printer connector.
4. Connect the other end, DB9-F connector, to your computer.
5. Use Omniprint part number:
CBL-625F-25M (DB-25 male on the host side)
CBL-69F-25M (DB-9 male on the host side)
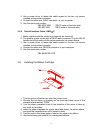
3-4-2 Parallel Interface Cable: OM19
-P
1. Make sure that both the printer and computer are turned off.
2. The parallel printer comes with a DB-25 male connector. Plug the DB-25
female end of the cable into the printer connector, as shown above.
3. Use a screw driver to fasten the cable screws to the t wo nut screws
installed on the printer connector.
4. Connect the other end, DB25-M connector, to your computer.
5. Use Omniprint part number:
CBL- 625M-25F-STR
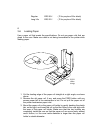
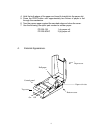
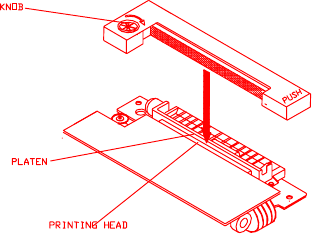
3-5 Installing the Ribbon Cartridge
1. Turn the printer off before you open the printer cover.
2. Remove the old ribbon by pressing on the front right hand corner of the
cassette where marked “PUSH”.
3. Turn the ribbon cassette’s knob in the direction of the arrow to take up
any slack in the ribbon.
4. Insert the ribbon between the printer head and platen, as shown above,
and push the cassette down until it snaps in place.
5. Turn the knob a few times again to take up any slack in the ribbon.
6. Use the following part number for ordering new ribbons: