


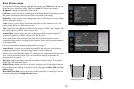

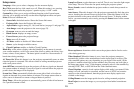

33
(For remaining items below, highlight the setting, then press Select one or more
times to change the setting value.)
Auto Start: Select On to have the player start the slide show when the USB flash
drive is first connected. Select Off to have the player display thumbnails when the
USB flash drive is first connected.
Show All Folders: Select On to have the slide show display all images in all
folders. Select Off to have the slide show display images only from the current
folder.
Fill Screen: Select On to have the slide show expand small images to fill the screen.
Select Off to have the slide show display small images at their original size.
Next Slide: Select Manual to disable automatic slide advance in the slide show.
Select other values to make the slide show advance to the next image automatically
(regardless of this setting, manual advance is always available by pressing the arrow
buttons).
Effect: Select Off to have no transition effect when changing between images
during the slideshow. Select Random to use a different random effect for each
transition. Select other values to use a specific effect.
Show Info: Select On to show the name of the current file and folder, the current
image number, and the total number of images in the slide show at the bottom of the
screen. Select Off to hide this information.
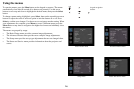
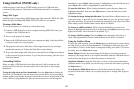
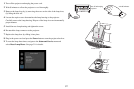
Displaying PowerPoint Slides
Follow the steps below to display PowerPoint slides using LitePort (these
instructions apply to PowerPoint 2007 in Windows; for other presentation programs
refer to the program's instructions or help file for the steps needed to save a
presentation as separate JPEG files):
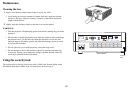
1 Connect the USB flash drive to your computer.
2 Open your PowerPoint document.
3 This step is optional but improves image quality: Click the Design tab near the
top of the PowerPoint document window, then click Page Setup. Click the
Slides sized for drop-down menu and select Custom. Change both Width and
Height to double their previous values, then click OK.
4 Click the Office button in the upper left corner of the PowerPoint document
window.
5 Point to Save As, then click Other Formats.
6 In the Save As dialog box, click the Save as type drop-down menu. Scroll
through the menu and select JPEG File Interchange Format.
7 Make sure the contents of your USB flash drive are visible in the Save As
dialog box before you continue - to view your USB flash drive in the Save As
dialog box, first click My Computer, then double-click the USB flash drive's
icon (make sure you do both of these in the Save As dialog box, not on your
computer's desktop).
8 Click Save. PowerPoint will ask if you want to export every slide or only the
current slide; click Every Slide. PowerPoint will save each slide in your
presentation as a separate JPEG file. These files are saved in a new folder that
has the same name as the original document.
9 Remove the USB flash drive from your computer and plug it into the
projector's LitePort connector.
10 On the projector, navigate to the folder created in step 8 and then start the slide
show (for instructions on navigating and controlling the slide show, see the
Controlling LitePort section above).
NOTE: PowerPoint embedded videos, transition effects, and animations are not
included when saving as JPEG. However, you can select a LitePort slideshow
transition effect by changing the Effect in the LitePort menu.