


Appendix- 81 -
English
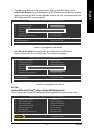
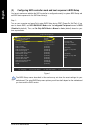
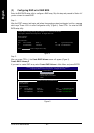
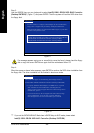
Step 2:
Later, select Hard Disk Boot Priority under the Advanced BIOS Features menu. In the Hard Disk
Boot Priority submenu, select the model of the SATA hard drive onto which you intent to install
Microsoft Windows 2000/XP (Figure 2).
Figure 2
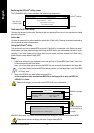
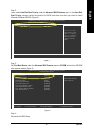
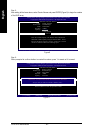
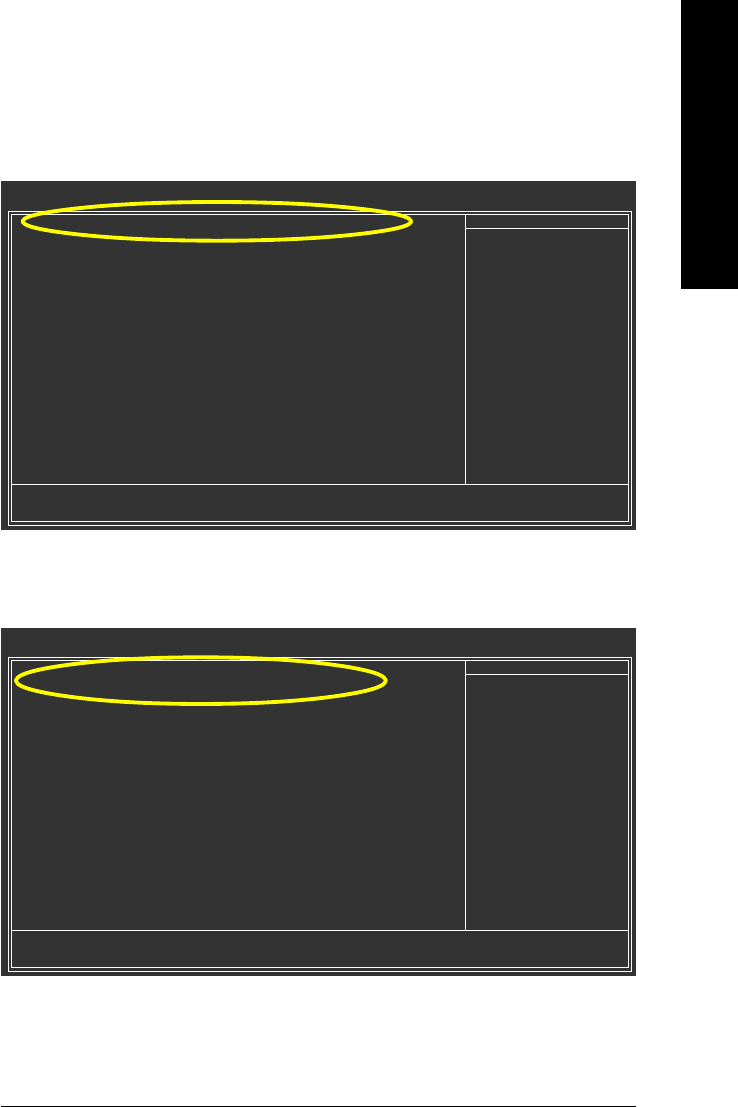
Step 4:
Save and exit BIOS Setup.
Figure 3
Step 3:
Set First Boot Device under the Advanced BIOS Features menu to CD-ROM to boot from CD-ROM
after system restarts (Figure 3).
CMOS Setup Utility-Copyright (C) 1984-2005 Award Software
Hard Disk Boot Priority
1. SCSI-0 : Intel Volume0
2. Bootable Add-in Cards
: Move PU/PD/+/-: Change Priority F10: Save ESC: Exit
Item Help
Menu Level
Use <> or <> to
select a device, then
press <+> to move it
up, or <-> to move it
down the list. Press
<ESC> to exit this
menu.
CMOS Setup Utility-Copyright (C) 1984-2005 Award Software
Advanced BIOS Features
Hard Disk Boot Priority [Press Enter]
First Boot Device [CDROM]
Second Boot Device [Hard Disk]
Third Boot Device [CDROM]
Password Check [Setup]
# CPU Hyper-Threading [Enabled]
Limit CPUID Max. to 3 [Disabled]
No-Execute Memory Protect [Enabled]
CPU Enhanced Halt (C1E) [Enabled]
CPU Thermal Monitor 2(TM2) [Enabled]
CPU EIST Function
(µù)
[Enabled]
: Move Enter: Select +/-/PU/PD: Value F10: Save ESC: Exit F1: General Help
F3: Language F5: Previous Values F6: Fail-Safe Defaults F7: Optimized Defaults
Item Help
Menu Level
Select Hard Disk Boot
Device Priority