Disassembly
2 - 8 Removing the Hard Disk Drive
2.Disassembly
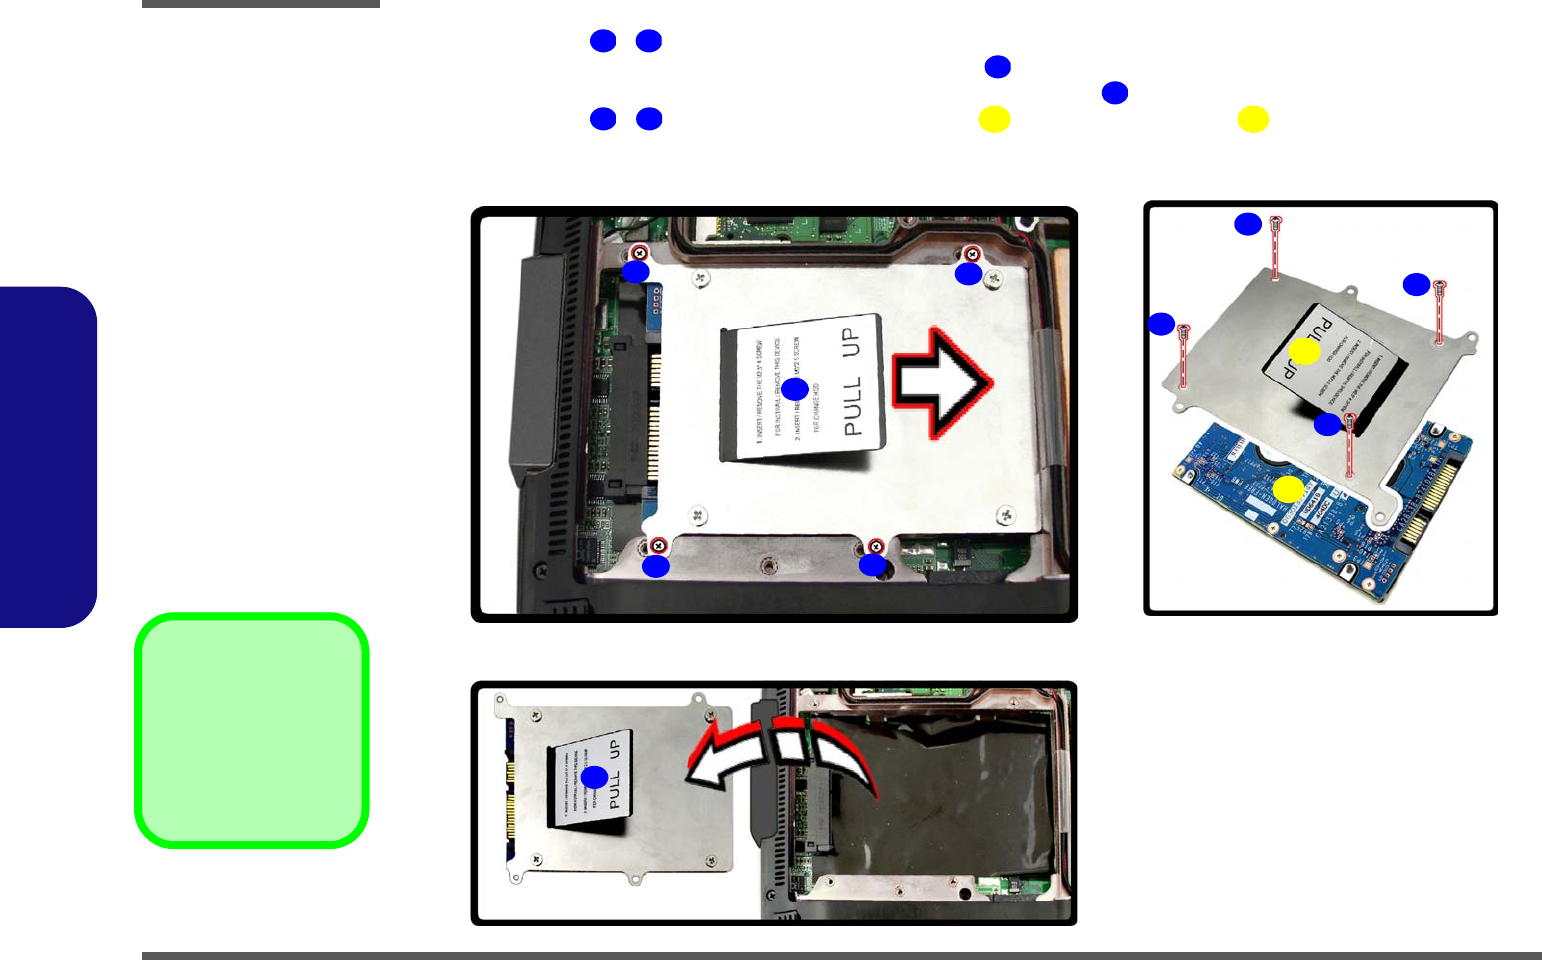
5. Remove screws - from the hard disk cover.
6. Slide the hard disk assembly in the direction of the arrow
.
7. Carefully remove the hard disk assembly in the direction of the arrow (Figure 3d).
8. Remove screws - and lift the HDD shielding plate up from the hard disk .
9. Reverse the process to install a new hard disk(s).
14 17
18
19
20 23
24 25
20
21
23
c.
e.
24
d.
25
22
14
15
17
16
18
19
Figure 3
HDD Assembly
Removal (cont’d.)
c. Remove screws and slide
the HDD module in the di-
rection of the arrow
d. Remove the HDD mod-
ule.
e. Remove the screws and
lift the shielding plate up
from the HDD.
24. HDD Shielding Plate
25. HDD
•8 Screws


