


Intel Server RAID Controller U2-1 (SRCU21) Quick Start Guide 15
12 Select "Product Options", then "Install product not listed". It will tell you
that it is going to scan the A: drive for installation scripts. Ensure the
"NetWare Installation" diskette is in the floppy drive, hit Enter to
continue.
13 A screen prompt will ask which components you wish to install. Select the
desired components, and hit F10 to continue. The appropriate files will be
copied and the AUTOEXEC.NCF and STARTUP.NCF files modified as
necessary.
CAUTION
Once the product is installed, check for and remove any duplicate lines in
STARTUP.NCF. For example, NetWare 4.2 installations may insert an
extra load line for the module PK411.NLM. Remove the extra line.
14 After the installation is complete, reboot the server to load the new drivers.
15 See Section 4.5 in the Intel Server RAID Controller U2-1 User's Manual to
customize your RAID volumes using Storage Console.
NetWare 5
✏
✏✏
✏ NOTE
If you do not use the boot capability of the NW5 CD, then replace step 2-5
below with steps 2-4 of the NetWare 4.2 instructions above.
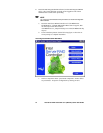
1 Create a NetWare Installation Diskette: Insert the Intel Integrated RAID
CD-ROM into the target system and restart the system to boot from the
CD-ROM. When the ROM-DOS Startup Menu appears select option #1
“Make Diskettes”. When the “Select a diskette to create” screen appears,
select “NetWare Installation”. A command window then appears. Insert a
blank high-density diskette in drive A: and press Enter to create the
NetWare Installation Diskette. Alternatively the CD-ROM can be inserted
into a different system running Windows 95, 98 or NT. The CD-ROM’s
“auto-run” feature will bring up a menu that will allow creation of the
NetWare Installation Diskette.
2 Insert the NetWare CD-ROM and reboot.
✏
✏✏
✏ NOTE
The CMOS may need to be edited on some systems to be set to boot from
the CD-ROM. Otherwise, if the system finds a partition on the hard drive it
will attempt to boot from it and an error will result.
3 After booting you will first be asked to Accept the License Agreement. Do
so. For a brand new volume, you should then select “Create a New Boot
Partition”.
4 NetWare will then ask for the size of the boot partition, you can either keep
the default of 50MB or hit Modify to change the size to suit your needs.
When you are done, select “Continue”.