


Intel® vPro™ and Intel® Centrino® Pro Processor Technology Quick Start Guide
22
• Use your own root certificate, if you already have one
• Use one of the certificate hashes provided with Intel vPro (i.e., already on the client systems)
Using your own root certificate: If you already have a root certificate on your LANDesk core server
(the provisioning server), then you need to do one of the following:
• instruct your Intel vPro client manufacturer (OEM) to place a matching certificate hash on each
Intel vPro client during manufacture
• manually enter the matching certificate hash using the Intel MEBx on each Intel vPro client
before deployment
If you instruct your OEM to load the certificate hashes onto your Intel vPro clients, the clients will
already have a certificate hash that matches the existing root certificate on your provisioning server
when they arrive. All you need to do is connect them to the network and power them on and they’ll
automatically provision themselves (assuming you’ve completed Steps 1-3 above). Then they will be in
a Configured state.
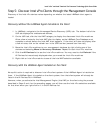
Skip to Step 5: Discover Intel vPro Clients through
the Management Console, on page 27.
Using one of the certificates provided with Intel vPro: If you want to use one of the certificates
provided with Intel vPro, you will need to purchase a matching root certificate, and load it onto your
LANDesk core server (the provisioning server). Once a matching root certificate is present on the
provisioning server, the Intel vPro clients will automatically authenticate themselves with the
provisioning server at power on, and will then automatically be provisioned by the provisioning server.
The certificates are purchased from one of the approved Certificate Authority (CA) vendors, such as
VeriSign, Comodo, Go Daddy, and Starfield. Check with your OEM to see which of these CA vendors
they support. The certificates are placed in C:\Program
Files\LANDesk\ManagementSuite\amtprov\certStore.
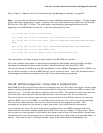
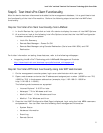
1. Create a new folder named cert_1.
2. Copy the three files that were received from the CA vendor (trusted_cert.pem, corecacert.pem,
corecakey.pem) into the cert_1 directory. You can create up to eight cert folders to hold eight
different certs from different CAs.
3. Some CA vendors may name the certificates differently. To be consistent, renamed the files to:
o trusted_cert.pem (root cert)
o corecacert.pem (the cert user buys from the CA)
o corecakey.pem (the private key the administrator generated when they bought the cert).
o Trusted_cert_intermediate.pem (The certificate that CA’s use to issue the cert you buy.
This is issued by the root cert from each CA.)
When your Intel vPro clients arrive, they will already have a certificate hash that matches the new root
certificate you just installed on your provisioning server. All you need to do is connect them to the
network and power them on and they’ll automatically provision themselves (assuming you’ve completed
Steps 1-3 above). Then they will be in a Configured state.