


3. Check if the TCP/IP Protocol is on your list of Network Protocols. If TCP/IP is not
installed, click the Add button to install it now. If TCP/IP is installed, go to step 5.
4. In the Select Network Protocol window, select the TCP/IP Protocol and click the
Ok button to start installing the TCP/IP protocol. You may need your
Windows CD to complete the installation.
5. After you install TCP/IP, go back to the Network window. Select TCP/IP from the
list of Network Protocols and then click the Properties button.
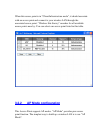
6. Check each of the tabs and verify the following settings:
IP Address: Select Specify an IP address. Specify the IP Address and
Subnet Mask as following example.
3 IP Address: 192.168.2.3 (any IP address within
192.168.2.2~192.168.2.254 is available, do not setup 192.168.2.1)
4 Subnet Mask: 255.255.255.0
• DNS: Let all fields are blank.
• WINS: Let all fields are blank.
• Routing: Let all fields are blank.
7. Click OK to confirm the setting. Your PC will now have the IP Address you
specified.
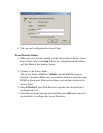
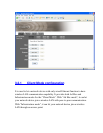
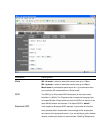
2. Enter 192.168.2.1 from Web Browser to get into the Access Point’s
configuration tool.
3. A screen will be popped up and request you to enter user name and
password. The default user name and password is as follows.
User Name: Admin
Password: 1234
Enter the default user name and password, then press OK button
directly.