


15
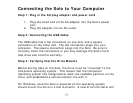
Connecting the Solo to Your Computer
Step 1: Plug in the AC plug adapter and power cord
1. Plug the small end of the AC adapter into the Solo’s power
port.
2. Plug the adapter into an AC outlet.
Step 2: Connecting the USB Cable
The USB cable has a flat connection on one end, and a square
connection on the other end. The flat connection plugs into your
computer. The square connection plugs into the Solo. Be sure to
correctly insert the connectors or you may damage the Solo’s hard
disk drive and void the warranty.
Step 3: Verifying that the Drive Mounts
Before storing data on the Solo, the drive must be “mounted” to the
computers operating system. This means that the computers
operating system has recognized at least one readable partition on the
drive, and established a communication link with it.
For Windows, once the Solo is powered on the operating system
should mount the drive in a few moments. A new drive icon/letter will