


50
Operation
3
Adjustments and settings in the menu (continued)
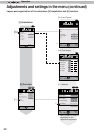
[1-2-3] Color Management
Custom 1~3
Set the 7 color axis (red / orange / yellow / green / cyan / blue / magenta) color as you
like and save it then. For example you may want to change only the red color of roses.
Please adjust to your preference. According to your adjustments, the input image in the
background changes. It is possible to conrm the video image before adjustment by
pressing the "HIDE" button of the remote control.
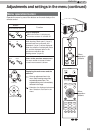
Pause
It is possible to display the input video image of the background being adjusted as a still
picture.
Settings: On, Off [Off]
On
Off
Freezes the input video image.
Unfreezes the input video image.
Color Selection
It is possible with the 7 colors of red, orange, yellow, green, cyan, blue and magenta to
precisely adjust the hue, color saturation and brightness, and then save it. Please adjust
to your preference.
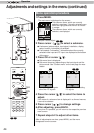
Axis Position
Fine-tune the position of the central axis of the selected color further.
Settings: -30 to 30 [0]
Hue
Adjust the hue.
Settings: -30 to 30 [0]
Saturation Adjust the color saturation.
Settings: (dim color), -30 to 30 (vivid colors) [0]
Brightness Adjust the brightness.
Settings: (dark) -30 to 30 (bright colors) [0]
[2] Input Signal
HDMI It is possible to set this if one selects the HDMI terminal to the submenu "[2-1] HDMI".
COMP. This can be set if one selects the COMP. terminal to the submenu "[2-2] COMP."
PC This can be set if one selects the PC terminal to the submenu "[2-3] PC".
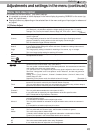
Picture Position
Please adjust if the edges of the picture are partially missing due to the timing of
horizontal and vertical synchronization signals. The value of the picture position depends
on the input signal.
(*) Depending on the input signal, it may be the case that not everything of the video
image is displayed.
(*) When there is a 3D input signal, adjustment is not possible.
Horiz.
Vert.
This aligns the horizontal direction of the image position.
This aligns the vertical positions of the image.
Aspect (Video)
(*) It is displayed when there is a video signal input.
(*) If set to3D, ratio is xed to 16:9.
Settings: 4:3, 16:9, Zoom [16:9]
4:3
Sets the screen size of the image to 4:3. For HD signals, left and right sides are reduced.
16:9
Sets the screen size of the video image screen to 16:9. For SD signals left and right sides
are expanded.
Zoom
Zooms the video images. (*) For HD signals, this cannot be selected.
Aspect (PC)
Sets the video image screen size when there is a PC video signal input.
(*) Is displayed when there is a PC signal input.
Settings: Auto, 1:1, Full [Auto]
Auto Positions the video image screen in the center of the display range, to ll the screen.
Depending on the size of the video screen, left and right black borders will be drawn.
Just
The video image screen size is displayed with the size of the input image.
Depending on the input video image, the screen will become smaller or part of the input
image off the screen is cut off.
Full It does not keep the aspect ratio of the video image screen and lls the entire screen.
RS50
RS50
RS60
RS50
RS50
RS60