


6
Presentations with KODAK EKTAPRO 7010,
7020, 9010 and 9020 Slide Projectors
One of the important new features of the KODAK EKTAPRO
7010, 7020, 9010 and 9020 Slide Projectors is the integrated
dissolver for a 2-projector dissolve.
You just have to link two projectors using the KODAK
Dissolve Cable (accessory) and you can immediately run
more interesting and lively live presentations using the
infrared remote control. It is also possible to play automatic
slide shows with a fixed dissolve time. However, it is not
possible to record the IR-commands.
Projection with a single projector
(Soft Slide Change)
If you are just presenting with a single EKTAPRO 7010,
7020, 9010 or 9020, you can fade your slides out and back in
again (e.g. by setting a dissolve time to smoothly change the
slides). This means the hard light change is avoided during
slide transport.
The commands and notes which relate to the control of an
individual projector are marked with an *.
Projection with two projectors
Choosing projectors (MASTER/SLAVE)
All commands for dissolving etc. are only transmitted to one
projector. This projector is called the MASTER. It passes
the commands on to the second projector which is known as
the SLAVE.
• You can use either the KODAK EKTAPRO 7010, 7020,
9010 or 9020 projector as a MASTER
• However, you can use all EKTAPRO models with a
P-Bus-in interface as a SLAVE!
Note: The use of all functions is only possible via
EKTAPRO IR-Remote Control! With the KODAK
EKTAPRO Cable Remote only dissolves in the default
setting (0.5 sec) can be carried out.
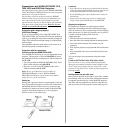
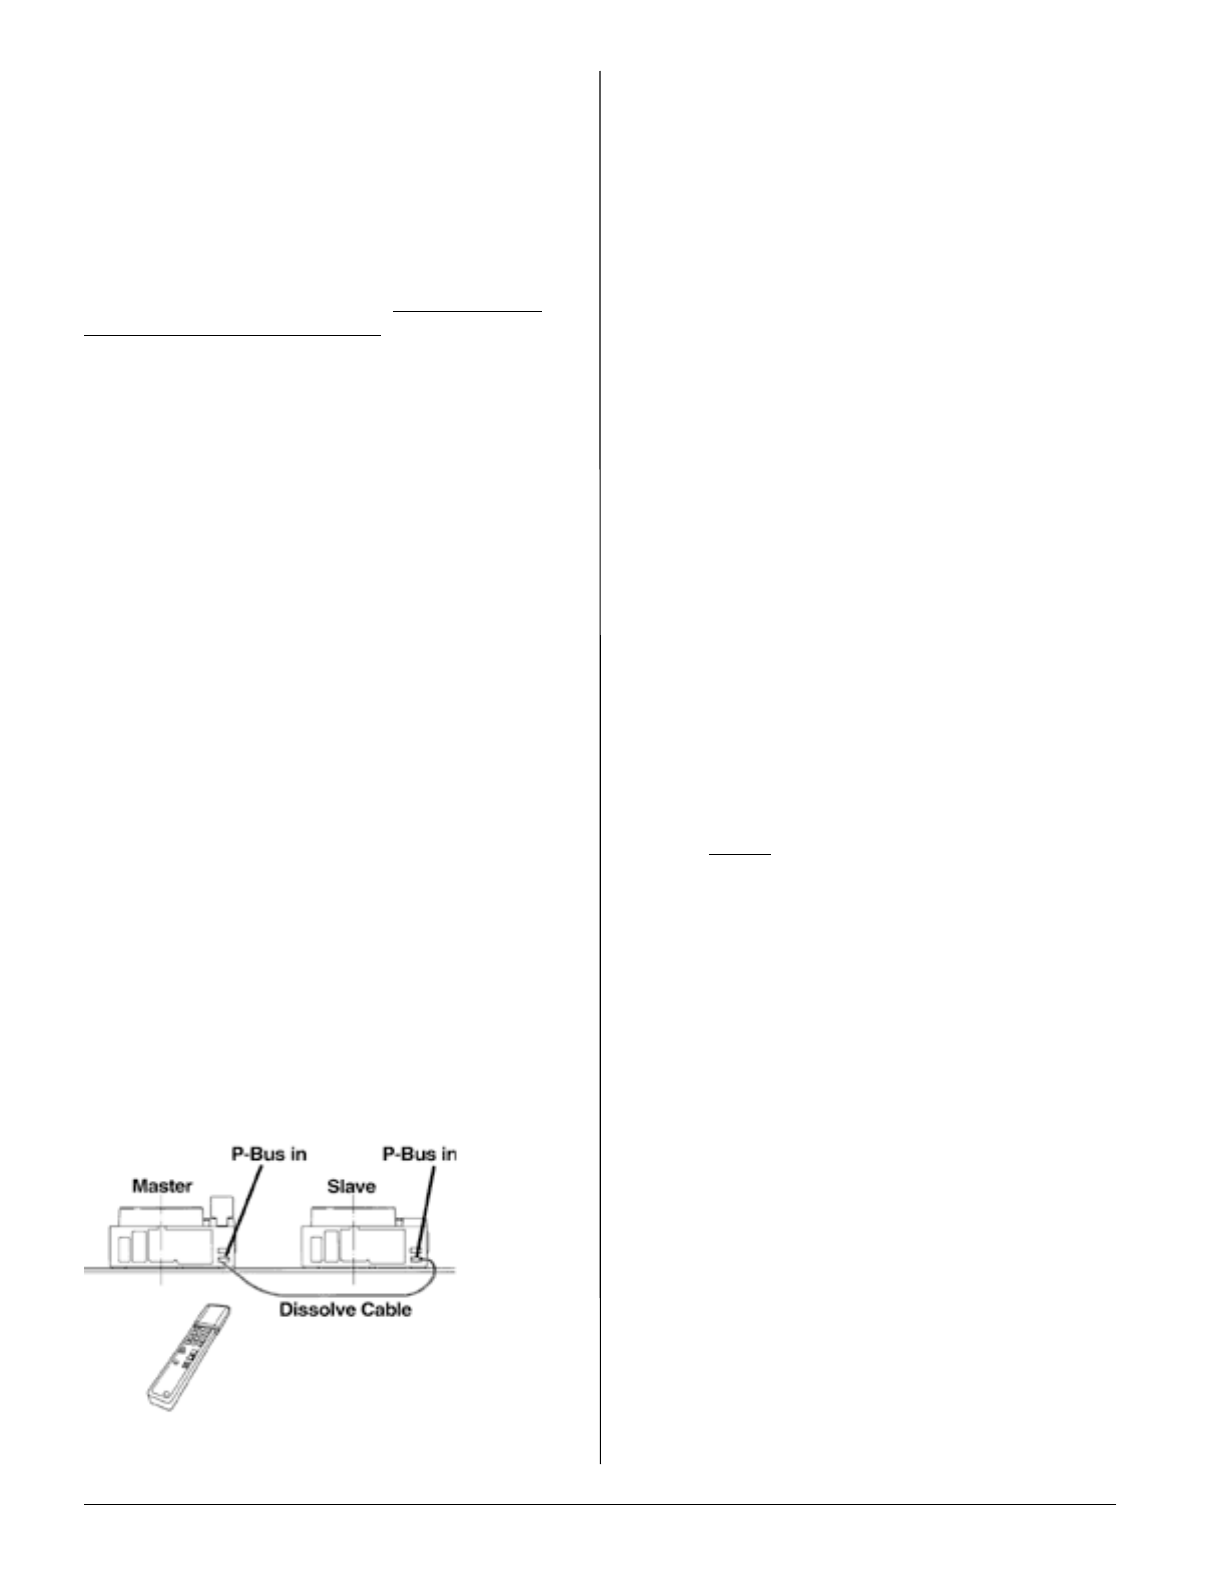
Setting up
Putting your 2 projector dissolve system together is fast and
easy. Connect the two projectors via the P-bus-in interface to
the KODAK Dissolve Cable (accessory) as shown in the
illustration! Connect your remote control to the MASTER
projector! Switch the projectors on. Your 2 projector
dissolve system is now ready to use.
Comments
• Even when the two projectors are linked with the dissolve
cable, they behave like individual projectors and can also
be operated individually as usual via the keypad.
• If your SLAVE projector has a built-in timer, it must be
switched off!
• If you want to use only one projector in single mode,
simply switch off the SLAVE and use the MASTER!
Aligning the projectors
It is important to align the two slide projectors before
beginning a presentation such that both projected images
cover the same area. This is easiest using so-called aligning
slides which your AV dealer will certainly carry in stock (it
is useful to load the aligning slide in the tray
compartment 80):
• Place the slide trays onto the projectors.
• Press the slide reverse transport button on both projectors.
• Focus both slides using the focus buttons on your
projectors.
• Now align the projectors to project both slides on the same
area.
• Now return both slide trays to their initial position (zero
position).
You can now begin your presentation using the remote
control.
Comment (EKTAPRO 7010, 7020, 9010 or 9020)
If it is necessary to carry out any additional adjustment
during the presentation push both transport buttons on the
“dark” projector for longer than one second. The “dark”
projector is now faded in too. Switch-off the lamp again by
pressing standby.
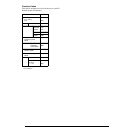
Sorting slides into the slide trays
Once you have decided on the order of your slides, number
them through. Then sort all the slides with uneven numbers
in sequence into the slide tray for the MASTER projector.
The slides with even numbers are sorted in order into the
slide tray for the SLAVE projector (see the table page 34).