TP-6810 11/1352 Section 4 Scheduled Maintenance
4.6.2 Coolin g System Inspection
To prevent generator shutdown or damage because of
overheating:
D Keep the cooling air inlets clean and unobstructed
D Inspect the radiator’s exterior for obstructions and
remove dirt and foreign material with a soft brush or
cloth to avoid damaging the radiator fins.
D Check the hoses and connections for leaks and
replace any cracked, frayed, or spongy hoses.
D Check the condition and tension of the radiator water
pump belt(s).
D Check the rubber seal of the radiator’s pressure cap
and replace a cracked or deteriorated cap. Remove
dirt and other debris from the pressure cap and filler
neck. The pressure cap raises the boiling point of the
coolant, enabling higher operating temperatures. If
the cap leaks, replace it with the same rating type of
cap. Find the pressure cap rating in Figure 4-5.
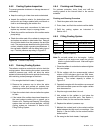
Item Rating
Pressure cap 97 kPa (14 psi)
Figure 4-5 Pressure Cap Rating
4.6.3 Draining Cooling System
The radiator contains a coolant drain valve to drain the
cooling system. When draining the coolant, remove the
radiator’s pressure cap, which will allow the entire
systemto drainand willprevent airpockets fromforming
and restricting coolant passage to the block.
1. De--energize the block heater, if equipped.
2. Remove the pressure cap to allow the entire
system to drain and prevent air pockets from
restricting coolant flow through the engine block.
3. Open the coolant dr ain valve and allow the system
to drain.
4. If the inside of the radiator has mineral deposits or
the used coolant contains dirt or grease, go to
Section4.6.4, Flushingand Cleaning. Ifthecooling
system does not have mineral deposits, refill the
cooling system as instructed in Section 4.6.5,
Filling Cooling System.
4.6.4 Flushing and Cleaning
For optimum protection, drain, flush, and refill the
cooling system at the interval listed in the service
schedule.
Flushing and Cleaning Procedure
1. Flush the system with clean water.
2. Drain, clean, and flush the coolant overflow bottle.
3. Refill the cooling system as instructed in
Section 4.6.5.
4.6.5 Filling Cooling System
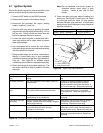
Model
Coolant Capacity, L (qt.)
Generator Set With Block Heater
38RCL 15.5 (16.4) 17.0 (18.0)
48RCL 17.5 (18.5) 19.0 (20.1)
60RCL 17.5 (18.5) 19.0 (20.1)
Figure 4-6 Coolant Capacity
Note: Do not add coolant to a hot engine. Adding
coolant to a hot engine can cause the cylinder
block or cylinder head to crack. Wait until engine
has cooled.
1. Close the radiator’s coolant drain valve and tighten
the hose clamps.
2. Fill the radiator with the recommended coolant
mixture of 50% ethylene glycol and 50% clean,
softened waterto inhibitrust/corrosion and prevent
freezing. The coolant capacity is shown in
Figure 4-6.
3. Operate the engine with the radiator cap removed
until the thermostat opens and the upper radiator
hose becomes hot.
4. Stop the engine and allow it to cool.
5. Add coolant to the radiator to just below the
overflow tube on the filler neck. See Section 1,
Service Views, for the overflow tube location.
6. Replace the radiator’s pressure cap.
7. Maintain the coolant level in the coolant overflow
bottle between the High and Low markings. See
Section 1, Service Views, for the coolant overflow
bottle location.
8. Re--energize the block heater, if equipped.


