


68
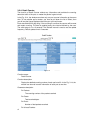
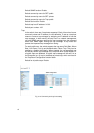
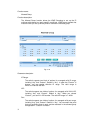
looping detection. After enabling looping action, you should decide which
port you would like to open loop detection capability. For example, you
open the loop detection of port 1 as enable state. When the looping
situation happens from port 1, Loop Detection will lock the port1’s ability.
And then you will see that the “Current Status” of port 1 shows Locked. In
port status function, you can see that the State of Port Configuration of
port 1 is “Disabled”. So the port 1 will lose the essential ability the port
could have. However, “Resume Action” in Loop Detection will remove the
looping status. It is very convenient for looping happening in real
networking environment. After any setting you done, please click the
<Apply> button to have the setting taken effect. When looping has
already happened, we suggest that the users could choose the looping
port as “Enable” in advance. And then tick the check box () of the
Action. That will get the better result for Looping removing.
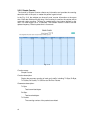
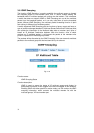
Parameters description:
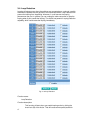
State:
Open the Loop Detection capability per port. The list has “Enable” and
“Disable”. Default is “Disable”.
Current Status:
Show the looping status per port. It could be “Unlocked or Locked”.
Default is “Unlocked”. When some port happens looping, it will show
“Locked”
Resume Action:
Remove the looping status per port. Just tick the check box () of the
Unlock to open resume action per port.
Refresh:
“Refresh” button could appear the instant Current Status of Loop
Detection.