


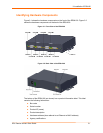

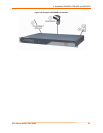

4: Installation: EDS8PR, EDS16PR and EDS32PR
EDS Device Servers User Guide 29
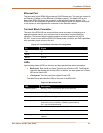
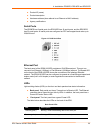
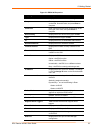
LED Description
Power (green) On = EDS is receiving power.
Status (yellow) Fast blink = initial startup (loading OS).
Slow blink (once per second) = operating system startup.
On = unit has finished booting.
On = EDS is connected to a 100 Mbps Fast Ethernet network. Speed (yellow)
Off = EDS is connected to a 10 Mbps Ethernet network.
Activity (green) Blink = EDS is sending data to or receiving data from the Ethernet
network.
Reset Button
The reset button is on the back of the EDS8/16/32PR, to the left of the power connector.
Pressing this button for 2-to-3 seconds reboots the EDS8/16/32PR and terminates all
data activity occurring on the serial and Ethernet ports.
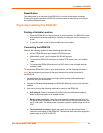
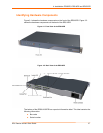
Physically Installing the EDS8/16/32PR
Finding a Suitable Location
You can install the EDS8/16/32PR either in an EIA-standard 19-inch rack (1U
tall) or as a desktop unit.
If using AC power, avoid outlets controlled by a wall switch.
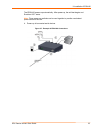
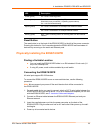
Connecting the EDS8/16/32PR
All serial ports support RS-232 devices.
To connect the EDS8/16/32PR to one or more serial devices, use the following
procedure:
Note: We recommend you power off the serial devices that will be connected to
the EDS8/16/32PR.
1. For each serial device you want to connect, attach a CAT 5 serial cable between the
EDS8/16/32PR and your serial device. For a list of cables and adapters you can use
with the EDS8/16/32PR, see E: Lantronix Cables and Adapters.
2. Connect an Ethernet cable between the EDS8/16/32PR Ethernet port and your
Ethernet network.
3. Insert the supplied power cord into the power connector on the back of the
EDS8/16/32PR. Plug the other end into an AC wall outlet. After power-up, the self-
test begins.
4. Power up all connected serial devices.