


TCP/IP Configuration LPR Printing
4-3
4.1.3 Using a BOOTP, DHCP, or RARP Reply
At boot time a host-based DHCP, BOOTP, or RARP server can respond to an MPS request
for an available IP address. For information about configuring the DHCP, BOOTP, or
RARP server, see your host documentation.
4.1.4 Using the Command Line Interface
1 Connect to the serial port (Port_1) using a console terminal or a terminal emulation
program, and press Return. The serial port settings are 9600 baud, 8 bits, 1 stop bit,
no parity.
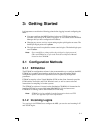
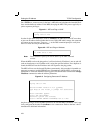
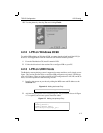
2 Become the privileged user.
Figure 4-4: Becoming the Privileged User
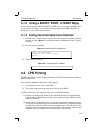
3 Enter the new IP address.
Figure 4-5: Configuring the IP Address
4.2 LPR Printing
The MPS provides two major methods of printing via TCP/IP: Berkeley remote LPR and
RTEL host software.
Two parameters must be configured for LPR printing:
1 The IP address or host name of the MPS.
2 The remote output queue (the name of the service on the MPS).
In addition, there are a few important things to note about LPR printing:
◆ Windows for Workgroups, Windows 95, and Windows 98 do not support LPR di-
rectly; however, Lantronix has provided a peer-to-peer printing solution on the dis-
tribution CD-ROM.
◆ Because of the way the LPR protocol is typically implemented on the host, the pro-
cessing options and banner page are sent after the job data itself. The MPS will print
a banner page at the end of a job, and cannot support most of the LPR options. If it
is necessary to have the banner page at the beginning of the printout, install and use
the RTEL software. If banners are not needed, they can be disabled.
Local> SET PRIVILEGED
Password> system (not echoed)
Local>>
Local>> define server ipaddress 192.0.1.201