


10 - LT Series Operations Manual
ADJUSTING THE REGISTRATION POSITION
Depending on the type of document being stamped, it may be necessary to
change the registration position. This can be accomplished by moving the
trigger assembly. The trigger assembly has a range of motion of about two (2)
inches forward or backward. The trigger assembly tells the unit how far the
document must be inserted before activating the stamp. The print locators on
either side of the top cover (Page 5, Figure 1, Number 1) can help you center the
registration point.
To adjust the registration position:
1. Disconnect the power source.
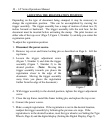
2. Remove top cover and frame locking pin as described on Page 6. Lift the
top frame.
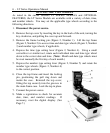
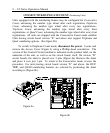
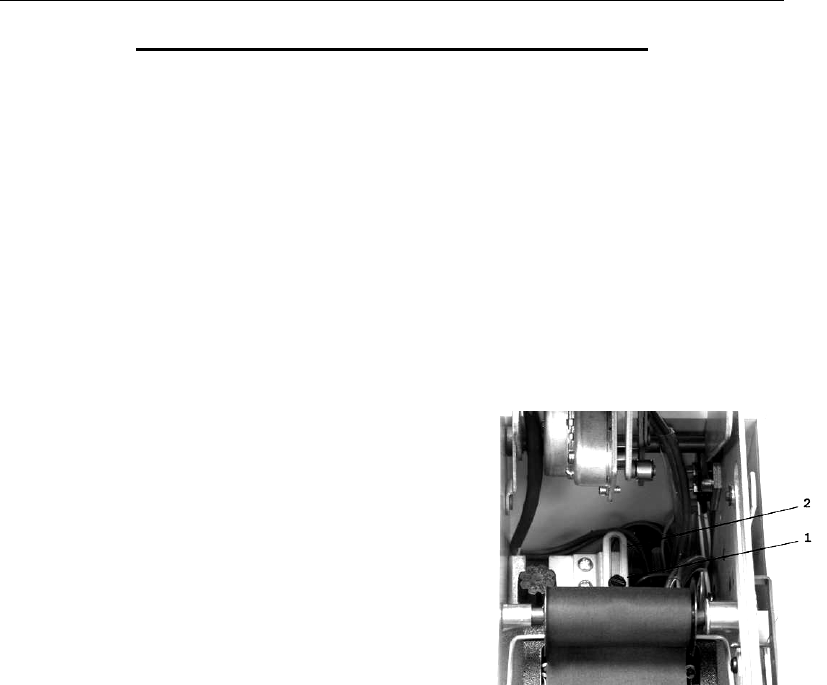
3. Loosen the trigger adjustment screw
(Figure 7, Number 1) and slide the trigger
assembly (Figure 7, Number 2) to the
desired position. (Note: Moving the
trigger assembly towards you places the
registration closer to the edge of the
document. Moving the trigger assembly
away from you places the registration
farther from the edge of the document.)
4. With trigger assembly in the desired position, tighten the trigger adjustment
screw.
5. Close the top frame, install the frame locking pin, and replace the top cover.
6. Connect the power source.
7. Make a sample registration. If the registration is not in the desired location,
readjust the trigger assembly by following the previous six steps. If the
registration is in the desired location, reset the type wheels (see Setting the Type
Wheels, Page 6) and the digital display (Setting the Digital Display, Page 7).
Figure 7