Getting to Know Your AIT Drive
page 7
LaCie d2 SCSI AIT Drive
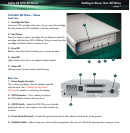
2.2 LaCie AIT Drive – Views
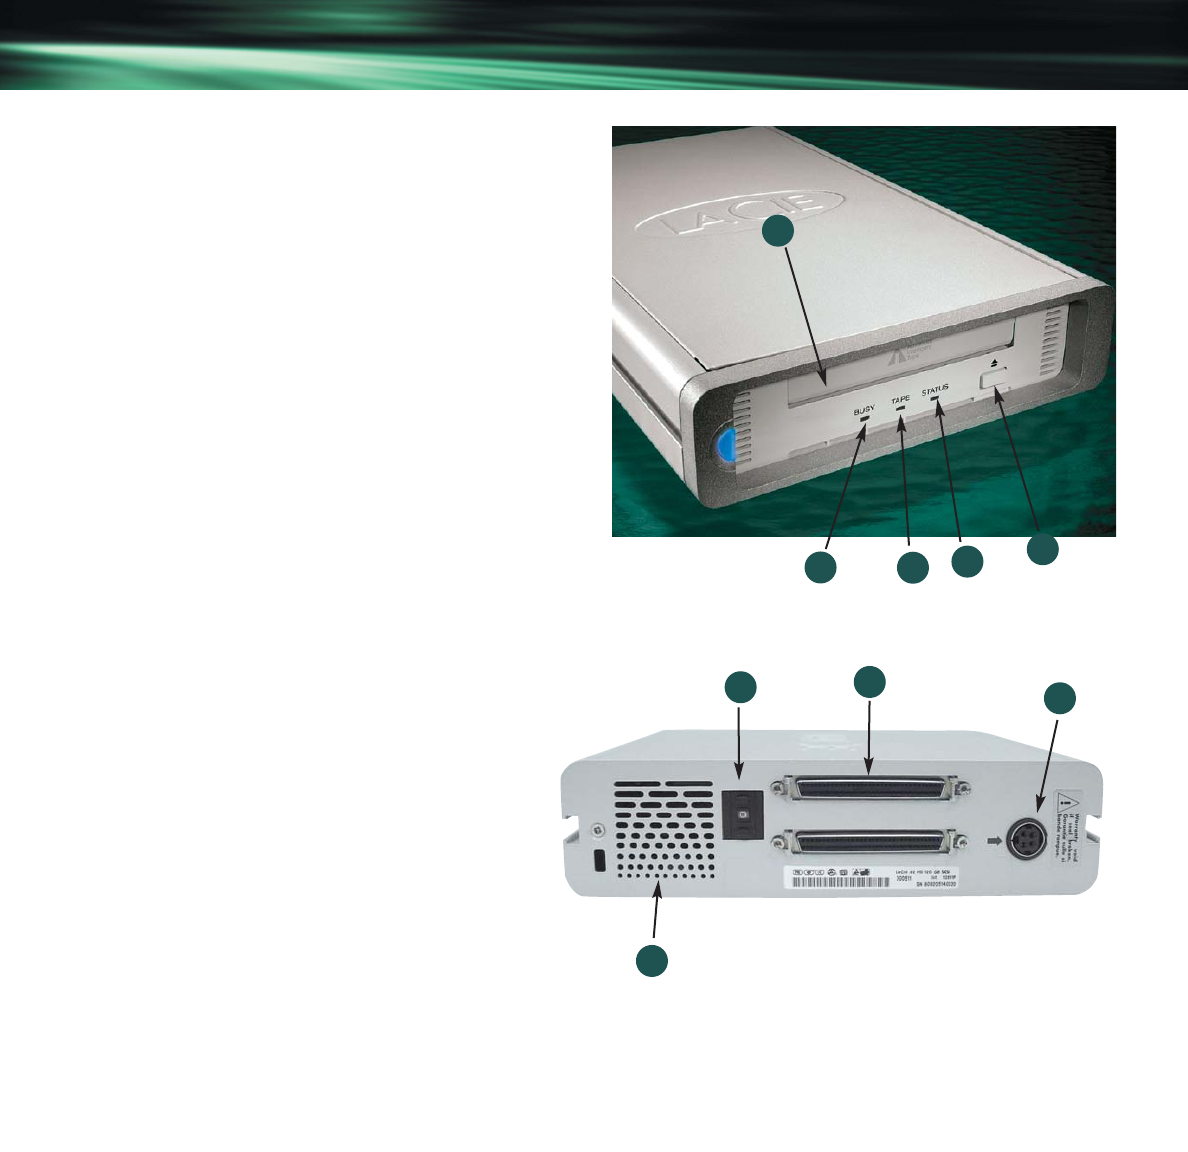
Front View
1 – Cartridge Slot Door
Insert your AIT cartridge in this door. As you insert the cartridge,
the drive takes hold of it and loads it into the mechanism.
2 – Eject Button
Press this button to eject a cartridge. Do not attempt to eject the
cartridge while the busy LED is blinking. Doing so may harm the
cartridge and lead to data corruption or loss.
3 – Busy LED
Blinks to show the drive is backing up or recovering data.
4 – Tape LED
Lights solid to show that a cartridge has been loaded.
5 – Status LED
Indicates when the drive heads need cleaning.
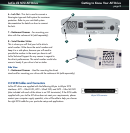
Back View
1 – Power Supply Connector
This is where you plug in the AC adapter supplied
with the drive. See 3. Setting Up Your LaCie
AIT Drive for details on connecting the adapter.
2 – SCSI Connectors - This is where you plug in
the SCSI cable furnished with your drive.
3 – SCSI ID Switch - Select the SCSI ID for your drive by
pushing the plus or minus signs to move the numbers up
or down.
4 – Frame Ground Terminal - Connect the ground terminals of other devices to the drive’s frame ground.
5 – Ventilation Outlet - Helps to keep your drive cool during operation. Be sure not to block this opening when using your drive.
1
4
3
5
2
5
3
2
1


