


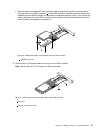
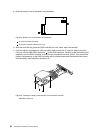
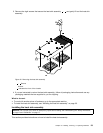


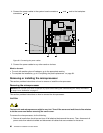

3. Remove the eight screws that secure the heat sink assembly 1 - 8 and gently lift out the heat sink
assembly.
Figure 43. Removing the heat sink assembly
1 - 8 Screws
9 Air ow
10 Indicates the front of the chassis
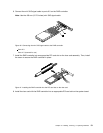
4. If you are instructed to return the heat sink assembly, follow all packaging instructions and use any
packaging materials that are supplied to you for shipping.
What to do next:
• To work with another piece of hardware, go to the appropriate section.
• To install the heat sink assembly, see “Installing the heat sink assembly” on page 53.
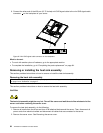
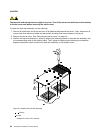
Installing the heat sink assembly
Attention: Do not open your server or attempt any repair before reading and understanding the “Safety information”
on page iii and “Guidelines” on page 17.
This section provides instructions on how to install the heat sink assembly.
Chapter 5. Installing, removing, or replacing hardware 53