


Removing a ServeRAID BR10-il controller
To remove the ServeRAID BR10-il controller, complete the following steps:
1. Read the safety information that begins on page vii and “Installation guidelines”
on page 29.
2. Turn off the server and all attached devices; then, disconnect all power cords
and external cables.
Note: When you disconnect the power source from the server, you lose the
ability to view the LEDs because the LEDs are not lit when the power source is
removed. Before you disconnect the power source, make a note of which LEDs
are lit, including the LEDs that are lit on the operation information panel and
LEDs inside the server on the system board.
3. Unlock and remove the side cover (see “Removing the side cover” on page 32).
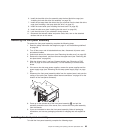
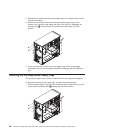
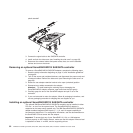
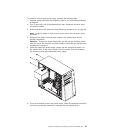
4. Open the rear adapter-retention bracket until the release lever on the right side
of the bracket clicks into place.
5. Squeeze the tabs on both sides of the connector on the signal cable and
remove the cable from the SAS/SATA controller.
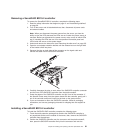
6. Carefully disengage the tabs on each side of the SAS/SATA controller connector
and the front of the SAS/SATA controller from the plastic standoff.
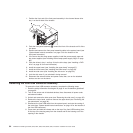
7. Grasp the edges of the SAS/SATA controller and pull it out of the connector. If
the standoff comes away from the system board with the controller, gently pull it
out of the controller and push it back into the hole on the system board.
8. If you are instructed to return the SAS/SATA controller, follow all packaging
instructions, and use any packaging materials for shipping that are supplied to
you.
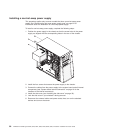
Installing a ServeRAID BR10-il controller
To install the SAS/SATA RAID controller, complete the following steps:
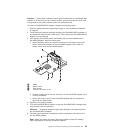
1. Touch the static-protective package that contains the SAS/SATA controller to
any unpainted surface on the outside of the server; then, remove the SAS/SATA
controller from the package.
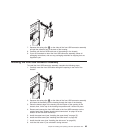
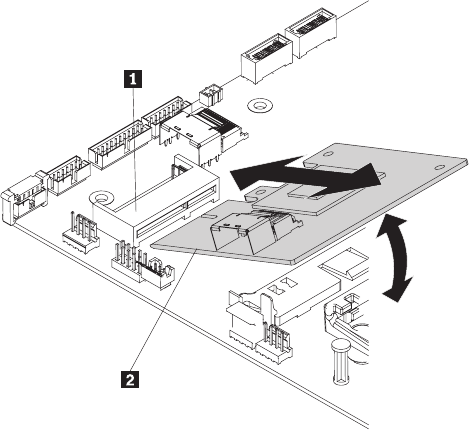
2. Position the SAS/SATA controller over the connector and the plastic standoff;
then, press the SAS/SATA controller firmly into the connector and onto the
Chapter 6. Installing and replacing customer replaceable units 91