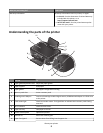
Scan menu
• Quality
• Original Size
Fax menu (selected models
only)
• Lighter/Darker
• Quality
Photo menu The following Photo options will not time out after two minutes of inactivity or after you
turn off the printer, but they will return to the factory default settings when a memory card
or flash drive is removed.
• Layout
• Colorized Effect
• Photo Size
• Quality
To change the temporary settings into new default settings
1 From the printer control panel, press .
2 Press the up or down arrow button to scroll to Defaults, and then press .
3 Press the up or down arrow button to scroll to Set Defaults, and then press .
Use Current appears on the display.
4 Press again to select Use Current.
5 Press until you exit Setup, or press another mode button.
To disable the settings timeout feature
You can disable the settings timeout feature if you do not want the printer to revert to the default settings after two
minutes of inactivity or after the printer is turned off.
1 From the printer control panel, press .
2 Press the up or down arrow button to scroll to Device Setup, and then press .
3 Press the up or down arrow button to scroll to Clear Settings Timeout, and then press .
4 Press the up or down arrow button to scroll to Never, and then press .
5 Press until you exit Setup, or press another mode button.
Changing the Power Saver timeout
The Power Saver timeout is the time it takes for the printer to switch to Power Saver mode when the printer is left idle.
The Power Saver feature optimizes energy efficiency by reducing the printer power consumption (as much as 28 percent
on some printer models) compared to the default printer settings. To save the most energy, select the lowest Power
Saver timeout.
1 From the printer control panel, press .
2 Press the up or down arrow button to scroll to Device Setup, and then press .
3 Press the up or down arrow button to scroll to Power Saver, and then press .
Using the printer control panel buttons and menus
17


