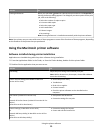
Use the To
Printing Preferences When you select File Print with a document open and then click Properties, a
Printing Preferences dialog appears. The dialog lets you select options for the print
job, such as the following:
• Select the number of copies to print.
• Print two-sided copies.
• Select the paper type.
• Add a watermark.
• Enhance images.
• Save settings.
Note: Printing Preferences is installed automatically with the printer software.
Note: Your printer may not come with some of these programs or some of the functions of these programs, depending
on the features of the printer that you purchased.
Using the Macintosh printer software
Software installed during printer installation
Applications are installed along with the printer software during installation.
1 From the Applications folder in the Finder, or from the Finder desktop, double-click the printer folder.
2 Double-click the application that you want to use.
Use the To
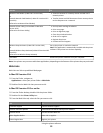
Print dialog Adjust the print settings and schedule print jobs.
Note: With a document or photo open, choose File > Print to
access the Print dialog.
Printer Services dialog (not available in Mac OS X
version 10.5 or later)
• Access the printer utility.
• Troubleshoot.
• Order ink or supplies.
• Contact Lexmark.
• Check the printer software version installed on the
computer.
Scan Center (in Mac OS X version 10.6)
or
Lexmark All-In-One Center (in Mac OS X version 10.5 or
earlier)
(referred to as All-In-One Center)
• Scan photos and documents.
• Customize settings for scan jobs.
Printer Settings (in Mac OS X version 10.6)
or
Lexmark AIO Setup Utility (in Mac OS X version 10.5 or
earlier)
(referred to as AIO Setup Utility)
• Customize settings for fax jobs.
• Create and edit the Contacts list.
Using the printer software
21


