


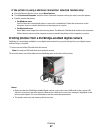

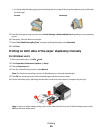
Warning—Potential Damage: Do not touch any cables, any network adapter,
any connector, the memory device, or the printer in the areas shown while actively
printing, reading, or writing from the memory card. A loss of data can occur.
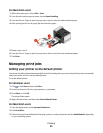
3 If the PictBridge connection is successful, then the following message appears on the display: Camera
Connected. Use Camera to choose and print photos.
4 If you want to change the default print settings:
a Touch More Options to access the PictBridge menu.
b Select the paper source, paper size, paper type, photo size, quality, and layout of the photos that you want
to print. Touch Accept each time you make a selection.
Note: The printer will use the default print settings unless you change the print settings from the camera.
5 See the documentation for your camera to begin printing.
Note: If you insert the camera while the printer is performing another job, then wait for the job to finish before
printing from the camera.
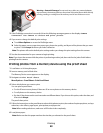
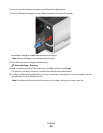
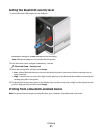
Printing photos from a memory device using the proof sheet
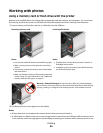
1 Load letter- or A4-size plain paper.
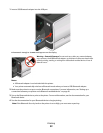
2 Insert a memory card or flash drive.
The Memory Device screen appears on the display.
3 Navigate to Print Proof Sheet:
More Options > Proof Sheet > Print Proof Sheet
4 Select which photos you want to print.
You can print a proof sheet:
• For the 20 most recent photos, if there are 20 or more photos on the memory device.
• For all photos on the memory device.
• By date, if the photos on the card were taken on different dates. If you choose this option, select the date, and
then touch Accept.
The proof sheet prints.
5 Follow the instructions on the proof sheet to select which photos to print, the number of copies per photo, red-eye
reduction, color effects, page layout, print options, and paper size.
Note: When making selections, make sure to fill in the circles completely.
6 Load photo paper.
Note: Make sure that the paper matches the size that you selected on the proof sheet.
Printing
48