


35
Verify printer setup
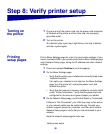
Step 8: Verify printer setup
Tu rn ing on
the printer
1 Plug one end of the printer cord into the power cord connector
at the back of the printer and the other end into a properly
grounded outlet.
2 Turn on the printer.
All indicator lights cycle (each light blinks, from top to bottom,
and then cycles again).
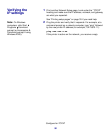
Printing
setup pages
Print a Menu Settings page for a list of current printer settings. If you
have a Lexmark E323n, your printer prints both a Menu Settings page
and a Network Setup page, listing the IP address and other network
settings.
1 Press and release Continue to print the page(s).
2 On the Menu Settings page:
• Verify that the options you installed are correctly listed under
“Installed Features.”
If an option you installed is not listed on the Menu Settings
page, turn the printer off, unplug the power cord, and
reinstall the option.
• Verify that the amount of memory installed is correctly listed
under “Printer Information.” Verify that the paper trays are
configured for the sizes and types of paper you loaded.
3 On the Network Setup page, confirm that Status is “Connected.”
If Status is “Not Connected,” your LAN drop may not be active
or your network cable may be malfunctioning. Consult your
network support person for a solution, and then print another
Network Setup page to verify that you are connected to your
network.
Save the network setup page for later use.