25
Setting Up: Advanced
Linksys EA-Series
4.
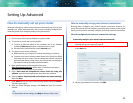
Select your ISP’s Internet connection type from the drop-down list.
Complete the Optional Settings only if required by your ISP.
TIP
For field descriptions, click Help at the top of the screen.
5.
Click OK.
IPv6 Internet connection settings
IPv6 is a new IP protocol that uses simplified packet headers and requires IPSec.
It also has improved support for mobile IP and computing devices.
NOTE
To use your router’s IPv6 Internet connection settings, IPv6 service
from your ISP (Internet service provider) is required. For more
information on this service, ask your ISP.
To manually configure your router’s IPv6 settings:
1.
Use an Ethernet cable to connect an Ethernet port on your router to the
Ethernet port on your computer.
2.
Log into Linksys Smart Wi-Fi. (See “How to connect to Linksys Smart Wi-
Fi” on page 7.
3.
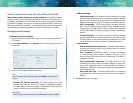
Under Router Settings, click Connectivity. The Connectivity page opens.
4.
Click the Internet Settings tab, then click IPV6.
5.
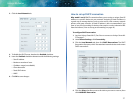
Click Edit. You can now change the following settings:
• IPv6 - Automatic—Select Enabled to use IPv6 for all network
addressing.
• DUID (device user ID)—Used by DHCP to identify network clients.
• 6rd Tunnel—Allows your router to send IPv6 IP addresses over IPv4
networks. To enable this option, IPv6-Automatic must be unselected.
To let your router handle the 6rd Tunnel settings (such as prefixes and
address masks), change the 6rd tunnel setting to Automatic. Select
Manual to change these settings manually.
• Prefix—Enter the prefix address used for the tunnel provided by your
ISP.
• Prefix Length—Enter the prefix length used for the tunnel provided
by your ISP.
• Border Relay—Enter the border relay address used for the tunnel
provided by your ISP.
• IPv4 mask length—Enter the IPv4 address mask length used for the
tunnel provided by your ISP.
6.
Click OK.
How to associate a router with your
Linksys Smart Wi-Fi account
To associate an additional router to your Linksys Smart Wi-Fi account:
1.
Run Setup for the additional router. When Setup is complete, you are
prompted to create a new Linksys Smart Wi-Fi account.
2.
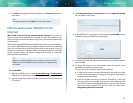
Instead of creating a new account, click Login at the top of the screen.
You are prompted to enter your account user name (e-mail address) and
password.
3.
Enter your original Linksys Smart Wi-Fi account user name and password,
then click Login. The additional router is added to your Linksys Smart
Wi-Fi account.
4.
To configure the additional router, log into Linksys Smart Wi-Fi, then
select the router’s SSID (network name) from the drop-down list at the
top of the screen.


