


Chapter 5
Configuring the Wireless-G Router
7
Wireless-G VPN Router with RangeBooster
Diagnostics. Use this screen to check the connection
between the Router and a PC.
Factory Default. If you want to restore the Router’s
factory defaults, then use this screen.
Firmware Upgrade. Click this tab if you want to upgrade
the Router’s firmware.
Reboot. Use this to restart the Router.
Status
Router. This screen provides status information about
the Router.
Local Network. This provides status information about
the local network.
Wireless. Status information about the wireless
network is displayed here.
System Performance. Status information is provided
for all network traffic.
VPN Clients. This screen provides status information
about the Router’s VPN clients.
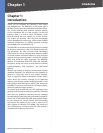
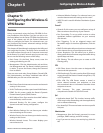
How to Access the Web-based Utility
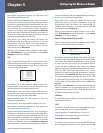
To access the web-based utility, launch Internet Explorer
or Netscape Navigator, and enter the Router’s default
IP address, 192.168.1.1, in the Address field. Then press
Enter.
Address Bar of Web Browser
NOTE: The default IP address is 192.168.1.1. If
the IP address has been changed using DHCP,
enter the assigned IP address instead of the
default.
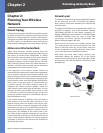
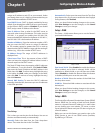
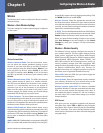
Password Request
•
•
•
•
•
•
•
•
•
A password request page will appear. (Windows XP users
will see a similar screen.) The first time you open the
web-based utility, enter admin (default user name) in
the User Name field, and enter admin (default password)
in the Password field. Then click OK. You can change the
password later from the Administration > Management
screen.
After you log in, the web-based utility displays the Setup
tab’s Basic Settings screen. Make the necessary changes
through the Utility. When you have finished making
changes to a screen, click Save Settings to save the
changes, or click Cancel Changes to undo your changes.
Help information is shown on the right-hand side of a
screen. For additional information, click More.
The utility’s tabs and screens are described below.
Setup
The Setup tab is used to access all of the Router’s basic
setup functions.
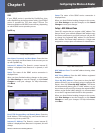
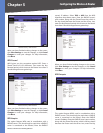
Setup > Basic Settings
The first screen that appears is the Basic Setup tab. This
tab allows you to change the Router’s general settings.
Setup > Basic Settings - Automatic Configuration - DHCP
Internet Setup
The Internet Setup section configures the Router for
your Internet connection type. This information can be
obtained from your ISP.
Internet Connection Type The Router supports six types
of connections. Each Setup > Basic Settings screen and