


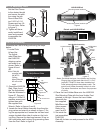
8
Install the LN9101M Lens to the already functioning
Projector by performing the steps below:
1. Locate the previously set aside LN9101M Lens
and place it on a flat surface oriented with the
small Lens Cover facing up. Refer to figure 22.
2. Carefully remove the small cover from the Lens by
screwing it counterclockwise, it will take multiple
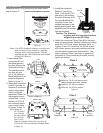
Note: When the EXT10 Extension Pole will be used,
attach the “Inner Pole” end to Plate #3 (instead
of Plate #2) using four (4) 5/16-18 inch nuts and
washers provided.
Refer to figure 17.
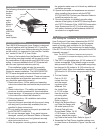
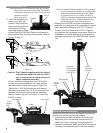
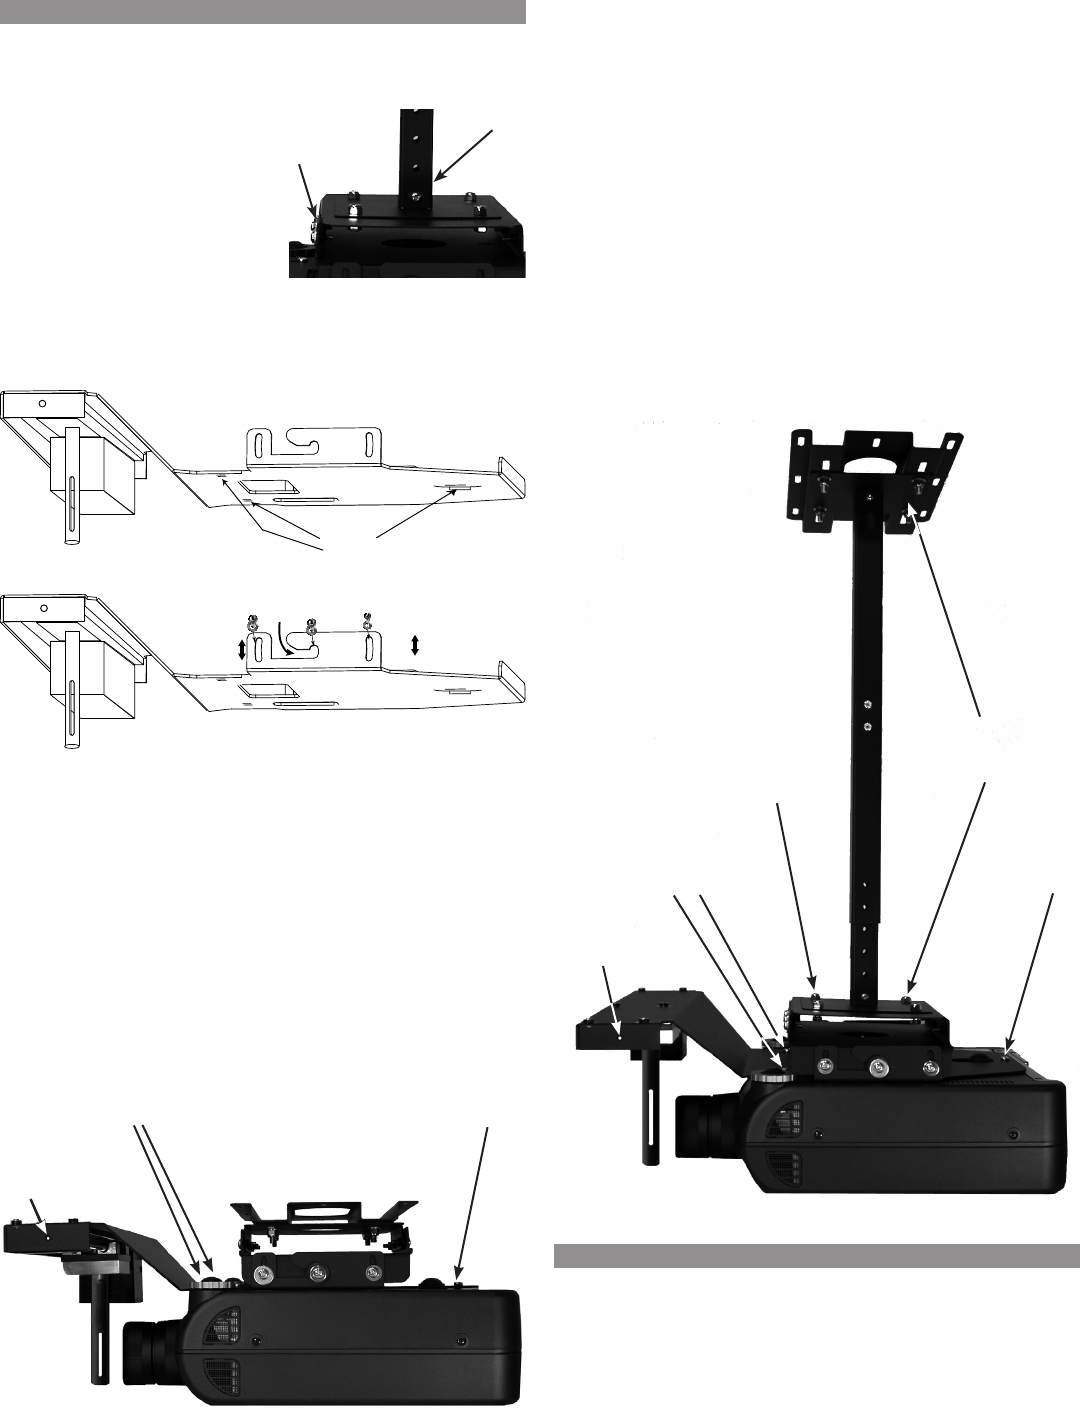
6. Invert the projector and
place it on a soft, flat
surface. Align the three
6mm mounting holes on
the projector with the
mounting holes on Plate
#4 and the LN9101M Sled. Secure the bracket to
the projector using the three 6mm screws. Refer to
figures 18 and 19.
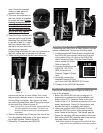
Caution: The Projector together with the mount-
ing brackets weighs 80 pounds (36.29
kg). It requires two or more persons to
safely complete assembly.
Lift and slide the projector onto the 1/4-20 inch
screws previously installed in the metal studs of
the plate on the ceiling (see arrow in Figure 19).
Tighten the 1/4-20 inch screws on both sides of
the mount and install four 1/4-20 inch screws and
washers into the side of the projector Mounting
Plate 4. Refer to figure 20 (or figure 21 when the
EXT10 is used).
MT20 Assembly, con’t
Figure 17
EXT10
Plate #3
Projector Side
10
0
Tilt
10
0
Tilt
Ceiling Side
Figure 19
mounting
holes
Figure 18
LN9101M Lens Installation
Note: For added horizontal stability 1/4-20 eye bolts
may be screwed into either side of plate 4 with
guide wires attached to the eye bolts. Refer
to figures 20 and 21. For safety, the MT20/
EXT10 is designed to support the weight of the
LN9101M and VP-11 Projector without assis-
tance from the eye bolts with guide wire.
7. Before the LN9101M Lens can be installed and
adjusted, it is important to first complete the Instal-
lation and Initial Settings of the VP-11 Projector.
Refer to the User Guide of the VP-11 Projector
and perform the necessary procedures. When the
Installation and Initial Settings of the projector is
complete, proceed to the LN9101M Lens Installa-
tion.
Figure 20
Ceiling
6mm screws
6mm screw
1/4-20
tapped
hole
Figure 21
Ceiling
6mm screws
6mm screw
Hex head
bolts and lock
nuts (supplied
with EXT10)
EXT10
Extension
Pole Kit
1/4-20
tapped
hole