


6
User Guide
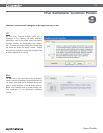
Software Installation
5
Y
ou must install drivers in order for Conectiv to operate properly. Please consult the included Quick Start Guide for
installation instructions.
Once the drivers are installed, you may need to configure your audio software to route signals to and from Conectiv. Refer to
your program’s user guide to learn how to do this.
Note: Windows XP and Mac OS X will recognize the Conectiv interface as a generic USB audio device if it is connected
before you install the drivers. Operation without drivers is not recommended because some of Conectiv’s features will not be
accessible in this mode. If you have already connected the interface to your computer, make sure to unplug it before beginning
with the driver installation.
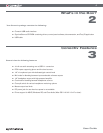
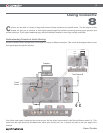
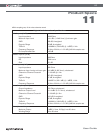
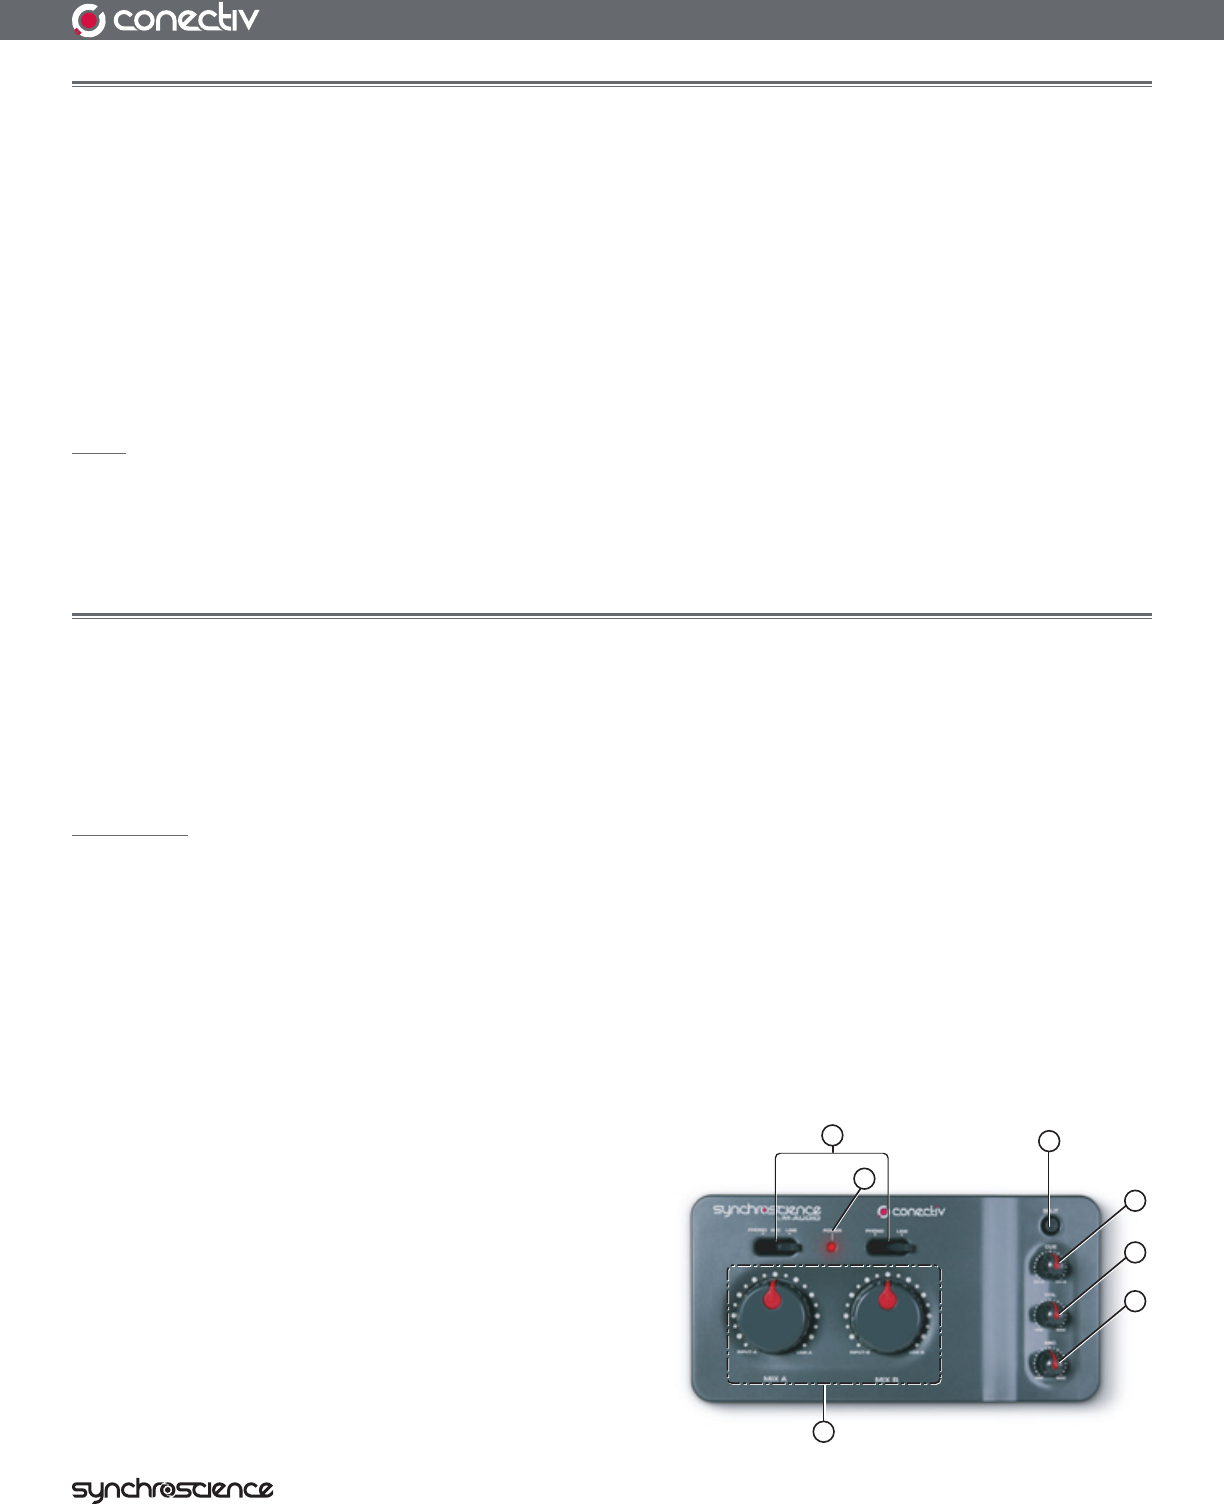
Controls and Connectors
6
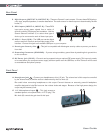
Top Panel
1. Source Selector (PHONO, MIC, LINE) – These switches select the input source for each stereo channel
of Conectiv. Note that both stereo channels have phono and line-level inputs. However, only Channel A has an
additional Mic input, allowing you to select a dynamic microphone connected to the Mic Input [#15].
2.
Power Indicator LED (POWER) – This red LED will illuminate when the interface is receiving power.
3.
Split Switch (SPLIT) – This switch selects between Normal and Split monitoring modes for the headphone
output. Press this switch to engage Split monitoring or leave the switch in the Up position for normal monitoring.
For more information about these two modes, see the section entitled “Headphone Monitoring” in Chapter 8.
4.
Cue Knob (CUE) – Conectiv has two stereo channels, and this knob lets you blend how much of each channel
you’d like to hear in your headphones. This knob is
covered in greater detail in the “Headphone Monitoring”
section of Chapter 8.
5.
Headphone Volume Knob (VOL) – This knob
controls the volume of the headphone output.
6.
Mic Gain (MIC) – This knob controls the gain
(volume) of the microphone input.
7.
Mix Knobs (MIX) – These knobs allow you to set the
source of each stereo output. To find out more about
this knob, see the section entitled “The Mix Knobs” in
Chapter 8.
1
4
5
6
2
7
3