


INSTALLATION
4 – 4
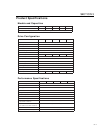
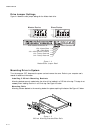
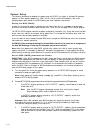
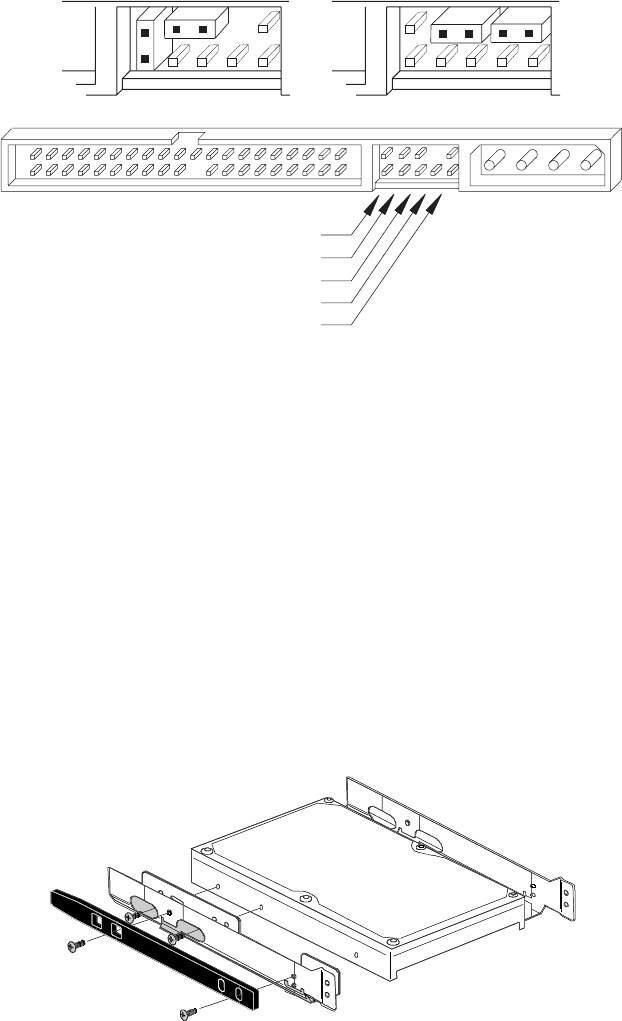
Drive Jumper Settings
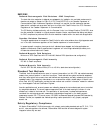
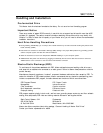
Figure 4-4 shows the valid jumper settings for the Maxtor hard drive.
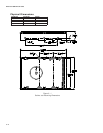
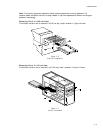
Mounting Drive in System
Turn the computer OFF, disconnect the power cord and remove the cover. Refer to your computer user’s
manual for additional information.
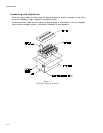
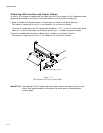
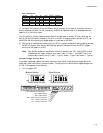
Installing 5.25-inch Mounting Brackets
Mounting brackets are only needed when the drive will be installed in a 5.25-inch drive bay. This step is not
necessary when installing the drive in a 3.5-inch bay. See Figure 4-5 below.
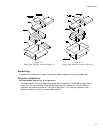
Mounting Rails
Mounting rails are attached to the mounting bracket for systems requiring this feature. See Figure 4-5 below.
Figure 4 - 4
Master/Slave Jumper Detail
Figure 4 - 5
5.25-inch Mounting Brackets/Slider Rails
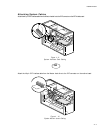
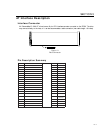
EIDE Interface Connector J1
Power Connector J2
J50 – Master/Slave
J48 – Cable Select
J46 – 4092 Cylinder Limitation
J44 – Factory Reserved
J42 – Factory Reserved
Master Device Slave Device
J50 J48 J46 J44 J42 J50 J48 J46 J44 J42