VIII. Standard Operation:
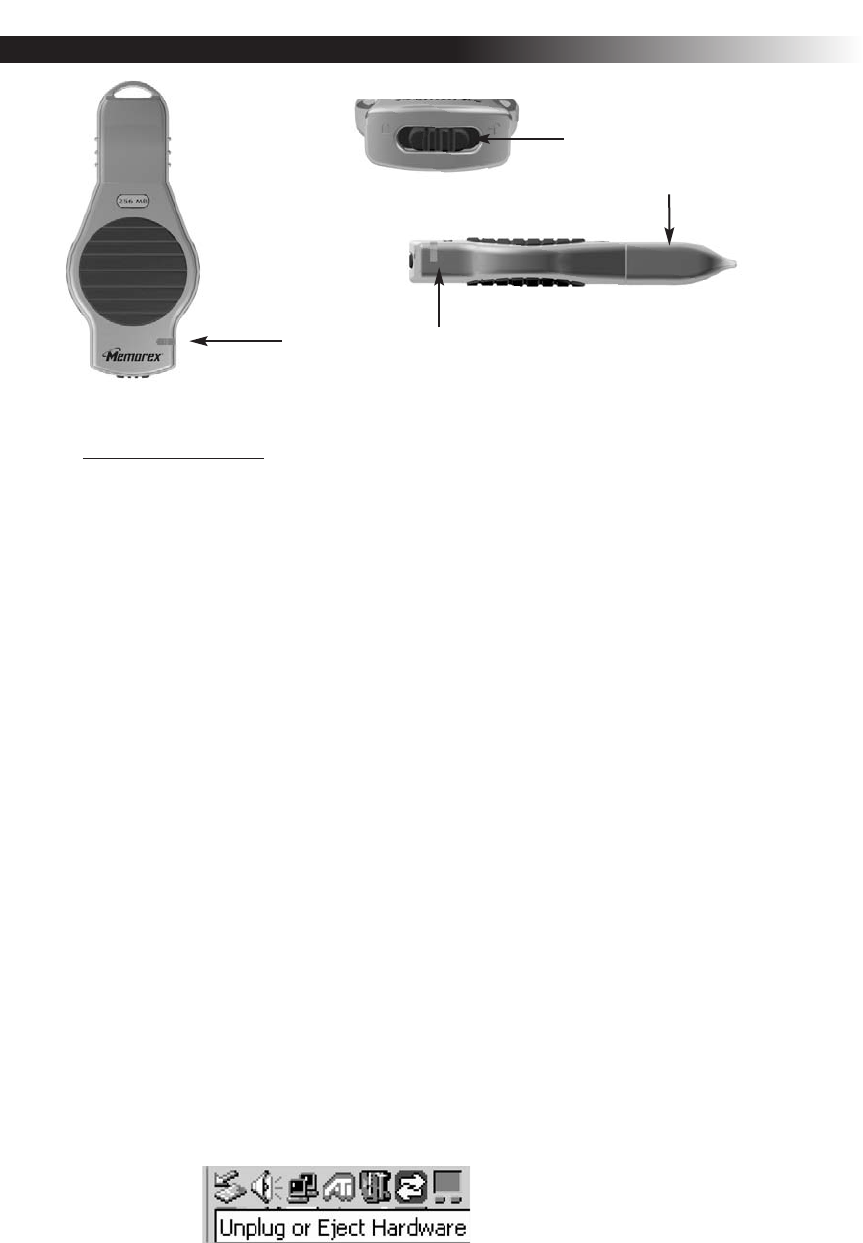
Write Protection Switch
Protective Snap-on Cap
LED Power and Activity Monitor
A) Microsoft Windows
®
1. Remove the protective snap-on cap. The cap was designed with a keyhole to
attach to the lanyard carrying strap for easy transport of your TravelDrive™ and
safekeeping of your drive.
2. Insert the TravelDrive™ into a USB port on your computer. The green LED
Power and Activity Monitor will light up to confirm that the drive is powered.
3. Double-click on the "My Computer" icon on your desktop, and then double-click
on the "Removable Disk" icon.
4. You can now save, copy, or delete files to the TravelDrive™ just as you would to
a hard drive or a floppy disk. The LED Power and Activity Monitor will flash
quickly when data is being transferred to or from the TravelDrive™.
5. Always wait for the LED to stop blinking and make sure no open files or other
applications are currently using your TravelDrive™ before attempting to remove
it from the USB port.
a. For Windows
®
Me/2000/XP, select the TravelDrive™ in the drive listing
under "My Computer" and right click to bring up options.
b.Selecting "Eject" from the drop-down menu will also safely remove the
drive
c. For
Windows
®
98 SE, you merely have to unplug the TravelDrive™ from the
USB por
t or USB connector cable to safely r
emove it.
6. Before removing the TravelDrive™ in Windows
®
Me, 2000 or XP, you can also
click on the "Unplug or Eject Har
dwar
e" icon in the lower right task bar on your
computer screen. (Figure 12). Select "Stop USB Mass Storage Device" with the
correct drive letter assigned to your TravelDrive™. Unplugging the device
without Stopping it or Ejecting it properly can cause your computer to become
unstable.
Figure 12
