


RAIDBank4 Owner’s Manual
36
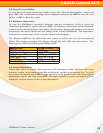
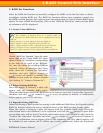
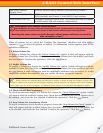
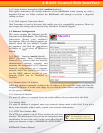
Host eSATA channel
Transfer Mode
SATA150, SATA150+NCQ, SATA300, SATA300+NCQ (default.)
HOST Channel (SATA/USB) RAIDBank4 supports two host channels. Host Channel 0 is the host
eSATA interface, and Channel 1 is the USB 2.0 host interface.
Drive Number (LUN 0-4) RAIDBank4 supports 4 logical units. Any Volume Set may be mapped
to eSATA and/or USB host channels independently.
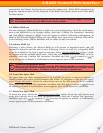
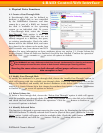
SIMULTANEOUS HOST CHANNEL VOLUME MAPPING
The RAIDBank4 can map a Volumeset to both host channels simultaneously for clustering environment.
Never attempt to mount the same volume on both channels without proper clustering software.
Mounting the same volume on both channels without proper software can result in
data corruption or loss!
!
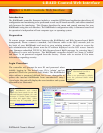
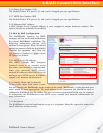
When all options are set, check the “Confirm The Operation” checkbox and click to
commit or to revert all options to default. A Confirmation screen appears prior to the
operation conclusion.
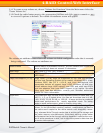
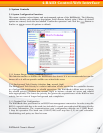
3.2 Delete Volume Set
To delete a Volume Set, choose the “Delete Volume Set” option. A table will appear with the
available Volume Sets. Check the radio button next to the Volume Set to be deleted, and check
the box labelled “Confirm the operation.” Click the Button.
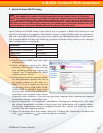
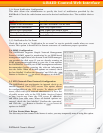
3.3 Modify Volume Set
To modify a Volume Set, choose the “modify Volume Set” option. A table will appear with the
available Volume Sets. Check the radio button next to the Volume Set to be modifed, and click
the Button. A table will appear with the modifiable attributes (refer to section 3.1 in this
chapter for attribute descriptions.) You can modify all values except the capacity.
Note:
When a volume set is migrating from one RAID level to another, a volume set stripe size changes, or when a disk
is added to a RAID set the volume state will change to migrating. During migration. The migration status will be displayed
in the volume state area of the LCD display. No additional volume changes can be performed until migration completes.
3.4 Check Volume Set Consistency
To check the internal integrity of a Volume Set, choose the “Check Volume Set” option. A table
will appear with the available Volume Sets. Check the radio button next to the Volume Set to
be checked, and check the box labelled “Confirm the operation.” Click the Button.
3.5 Stop Volume Set Consistency Check
To stop a consistency check already in progress, choose the “Stop Volume Set Check” option. A
table will appear with the available Volume Sets. check the radio button next to the Volume Set
to be aborted, and check the box labelled “Confirm the operation.” Click the Button.
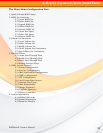
4-RAID Control-Web Interface