


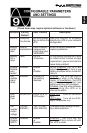
21
English
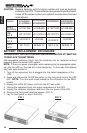
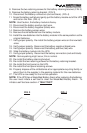
8. Remove the two retaining screws for the battery retaining bracket. (FIG. 3)
9. Remove the battery retaining bracket. (FIG. 3)
10. Disconnect the Battery connectors (red and black). (FIG. 4)
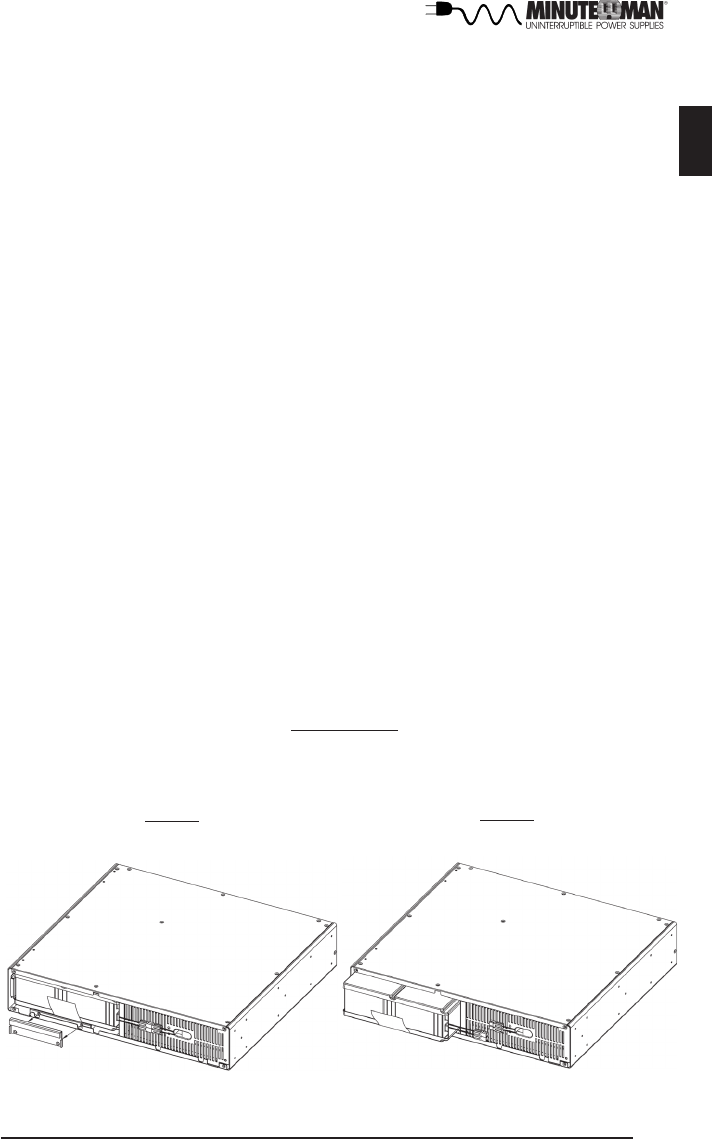
11. Grasp the battery pull tab and gently pull the battery module out of the UPS
and set on the floor. (FIG. 4)
NOTE: Use Caution, the battery module is heavy.
12. Disconnect the battery positive (red) wire.
13. Disconnect the battery negative (black) wire.
14. Remove the battery jumper wires.
15. Remove the old batteries from the battery module.
16. Install the new batteries into the battery module in the same position as the
original batteries.
17. Verify proper polarity. Re-install the battery jumper wires on the new batt-
eries.
18. Verify proper polarity. Reconnect the battery negative (black) wire.
19. Verify proper polarity. Reconnect the battery positive (red) wire.
20. Slide the battery module into the UPS.
21. Verify proper polarity. Reconnect the battery connectors (red and black).
NOTE: Some sparking might occur, this is normal.
22. Re-install the battery retaining bracket.
23. Re-install the two retaining screws for the battery retaining bracket.
24. Re-install the front panel on the UPS.
25. Re-install the front panel retaining screws.
26. Properly dispose of the old batteries at an appropriate recycling facility or
return them to the supplier in the packing material for the new batteries.
27. The UPS is now ready for the normal operation.
NOTE: If the UPS has a Weak/Bad Battery Alarm after replacing the batteries,
the user must initiate a self test to clear the Weak/Bad Battery Alarm. To
initiate a self test see section 4 "SELF TEST".
FIG. 3
FIG. 4